How to Set Up Free Monitoring and Alerting for Your Website
In this article, I'm going to show you how to use Google Cloud's free-tier virtual machine to deploy a docker image of Uptime Kuma - an excellent open-source monitoring solution. Then, I'll show you how to set up a monitor for any website, using my own site as an example. Lastly, I will set up Slack notification alerts to be quickly notified if there's anything wrong with my site.
It's about time I set up monitoring and alerting for my website - It's extremely important for any service, as you need to know when something isn't working.
So let's dive into it:
Set Up a Google Cloud Account
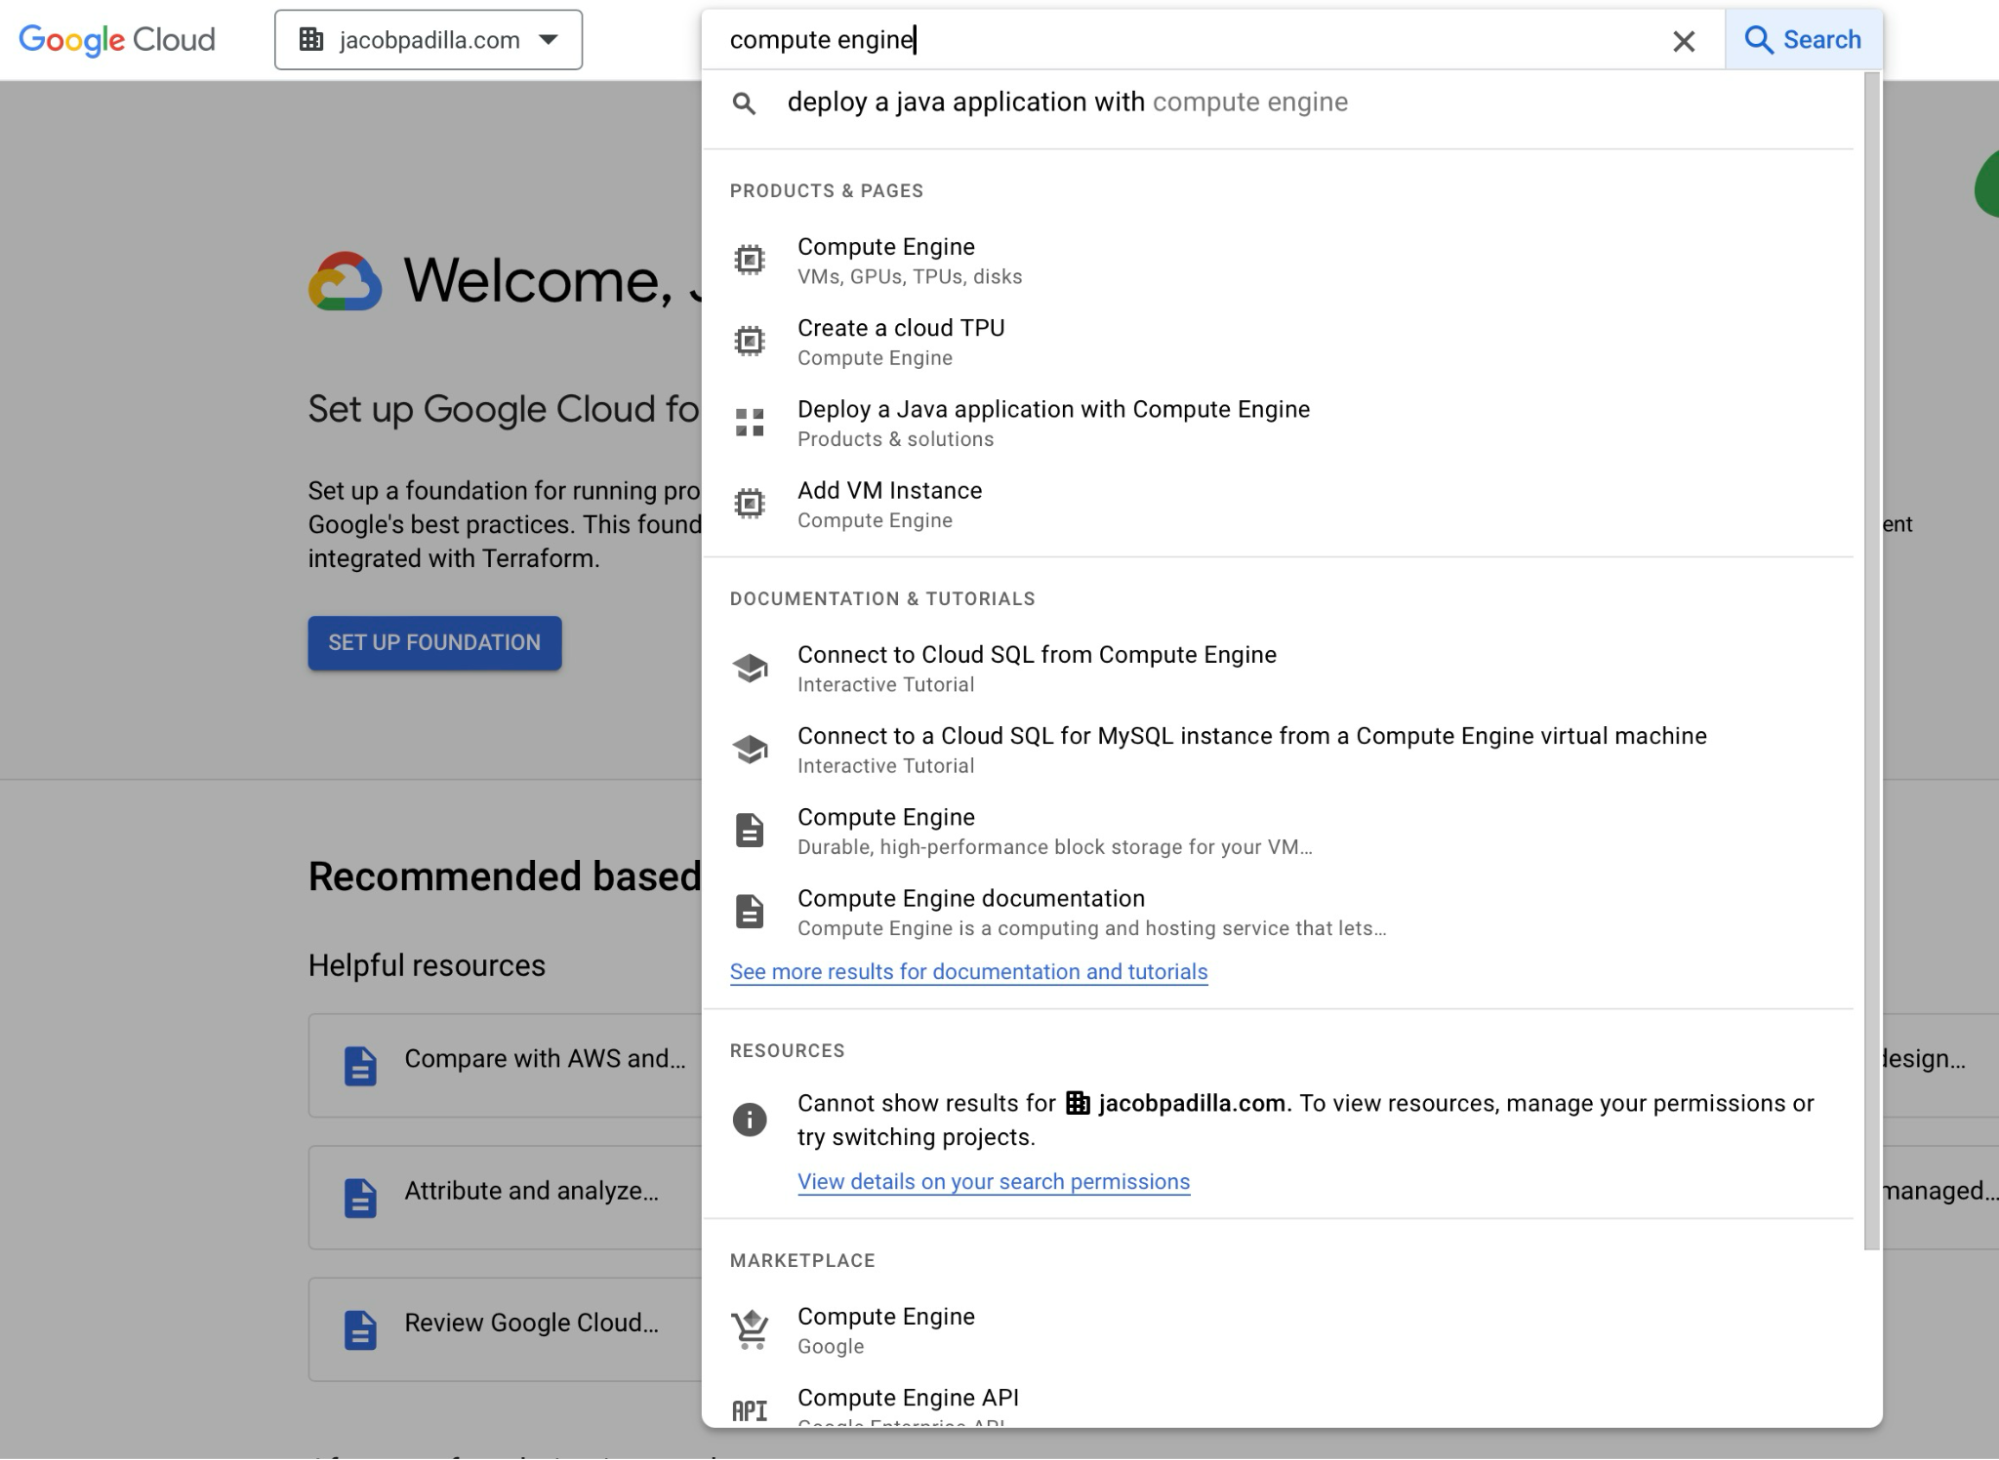
The first thing you'll need to do is create a Google Cloud account. Once you've created an account, type "compute engine" into the search bar:
Then, you will need to select a project (I chose the pre-made "personal projects" one). In Google Cloud, projects are essentially organizational units designed to neatly compartmentalize and manage your resources, APIs, users, and billing for different initiatives.
After selecting a project in the top right of the page, you should see the screen below. Since we're using Google Cloud's compute engine (their basic virtual machine service) you'll need to enable that specific API.
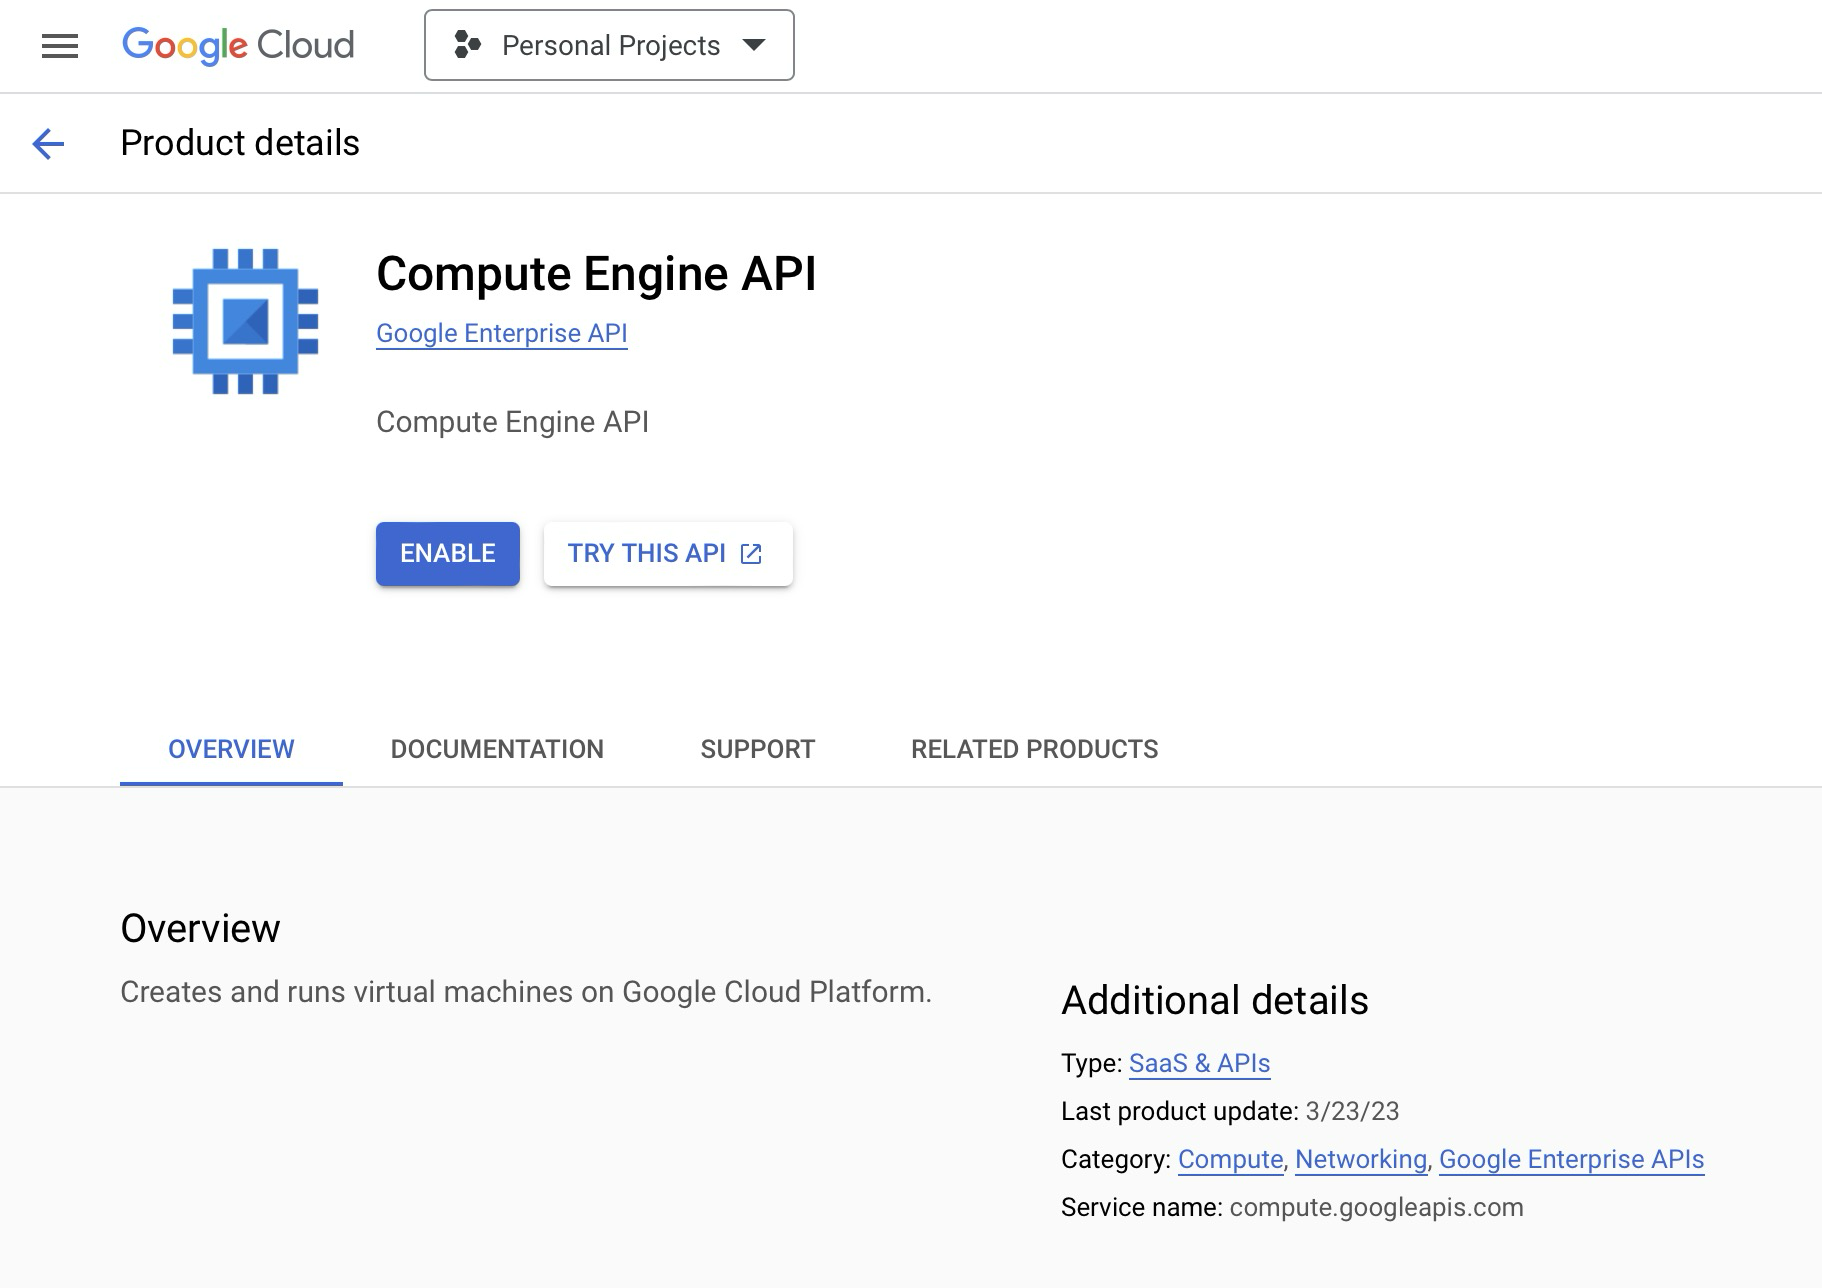
At this point, Google Cloud will probably ask you to enter in some billing information. However, the monitoring solution I'm making in this article fits within the free tier specifications, so you shouldn't be charged anything.
Create a VM Instance
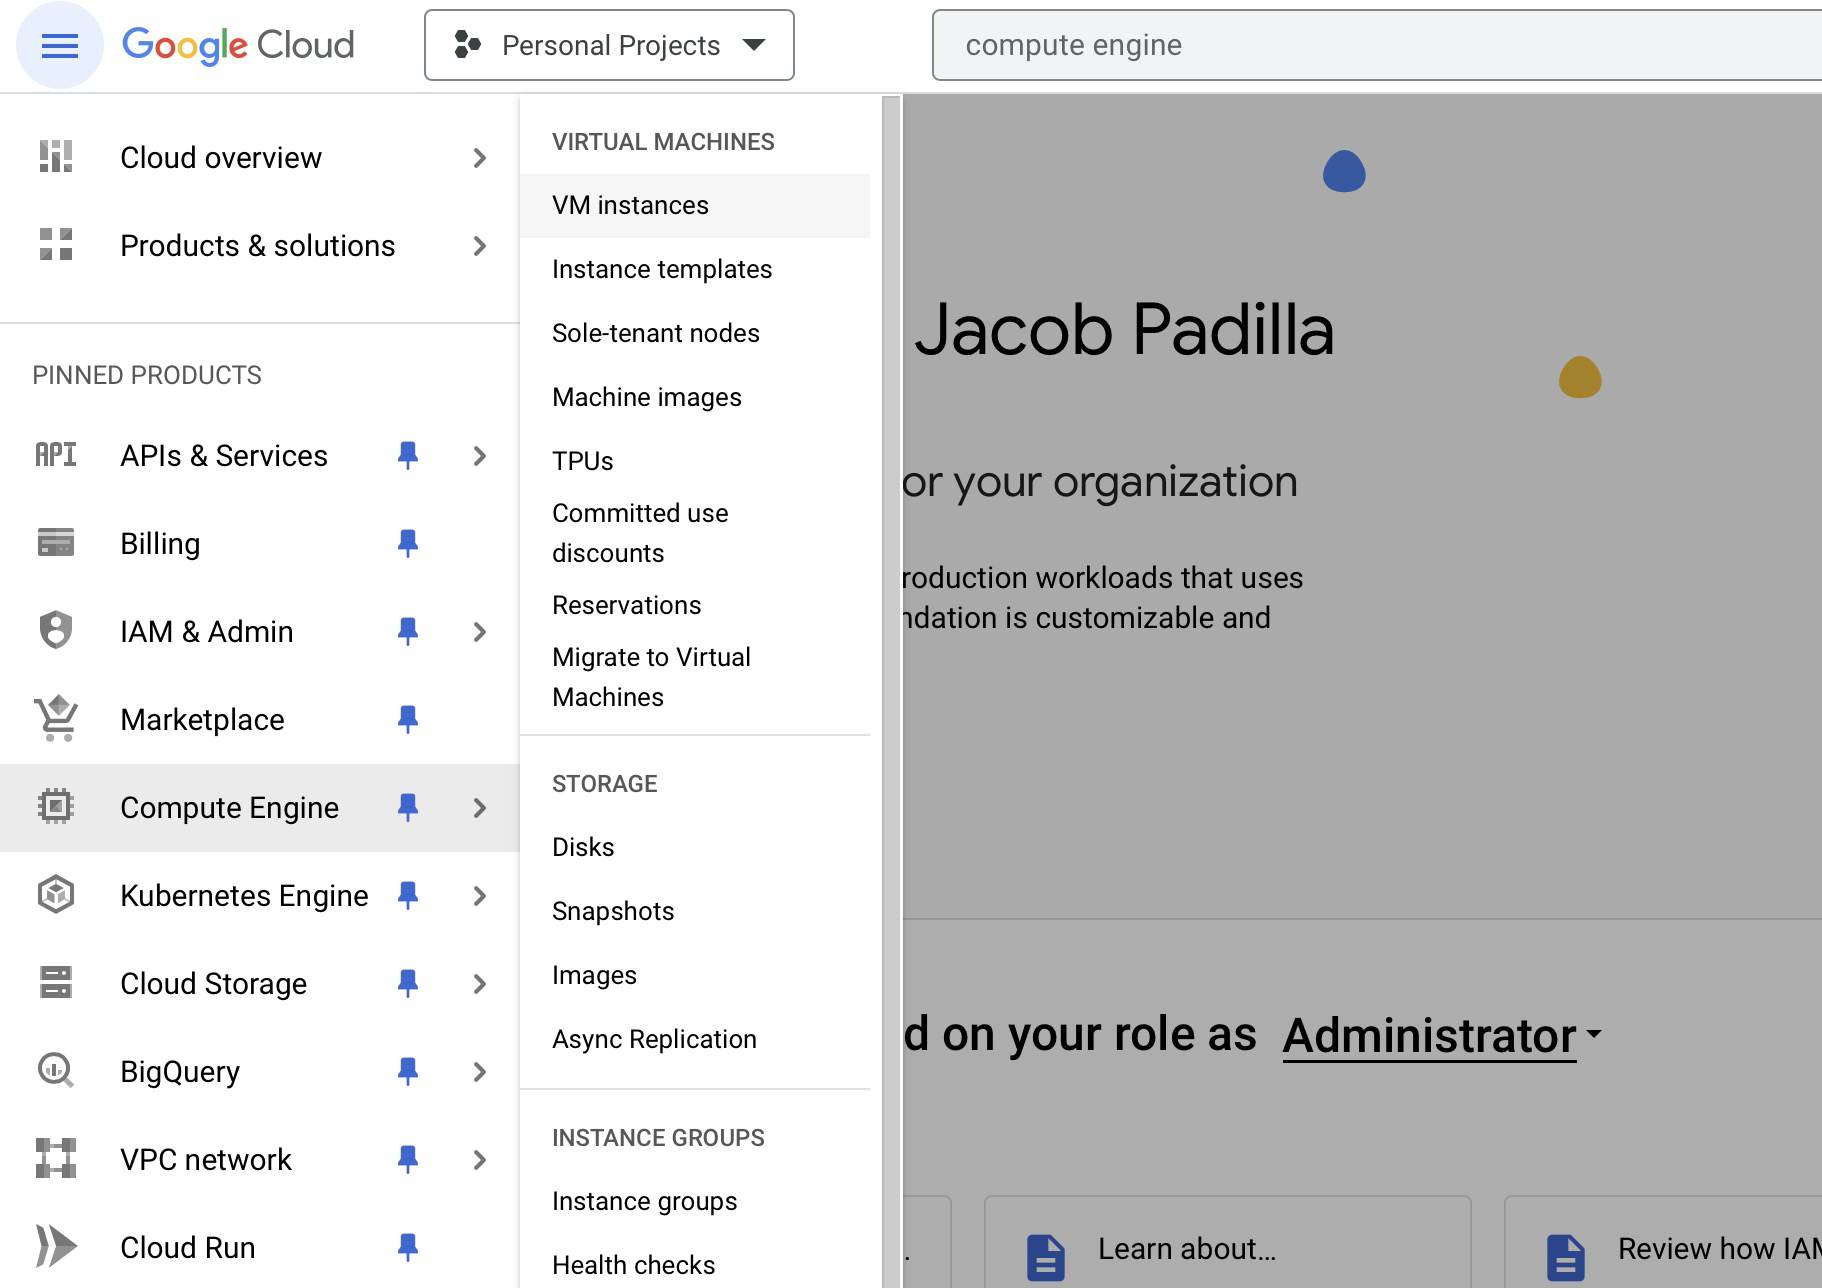
Once the compute engine API is turned on (which may take a minute), click the hamburger menu on the top right, then go to "Compute Engine" and then "VM Instance." This page is where you'll be able to view, create, and manage all of your virtual machines!
Then, click the big “Create Instance” button.
If you want to read Google's official documentation on their free tier, you can do so here; however, for this project, the important thing to know is that Google lets you set up one VM for free, as long as it's within the following criteria (as of 1/08/2024):
1 non-preemptible e2-micro VM instance per month in one of the following US regions:
Oregon: us-west1
Iowa: us-central1
South Carolina: us-east1
30 GB-months standard persistent disk
1 GB of outbound data transfer from North America to all region destinations (excluding China and Australia) per month
So, after clicking “create instance,” we can now configure our server!
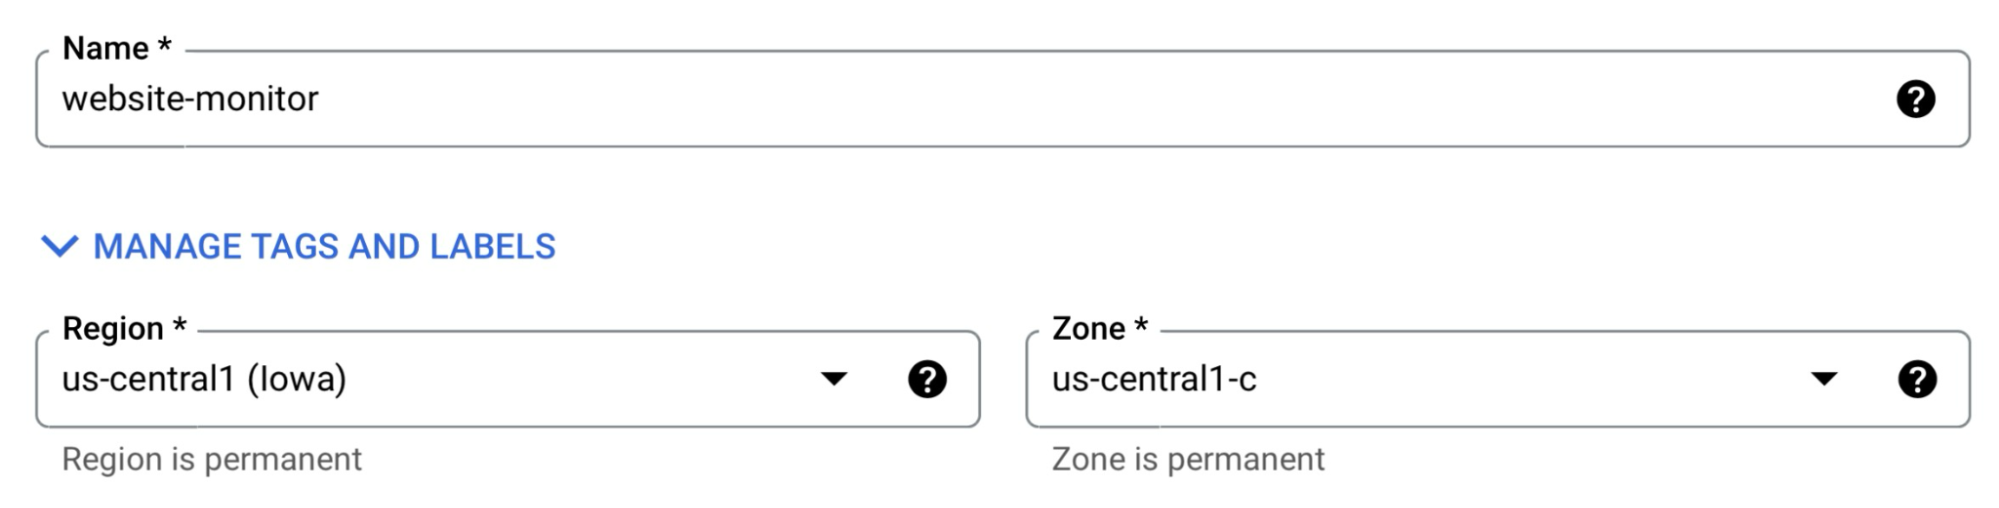
First give the server a nice name and set the “Region” to one of the three locations on Google's free tier:
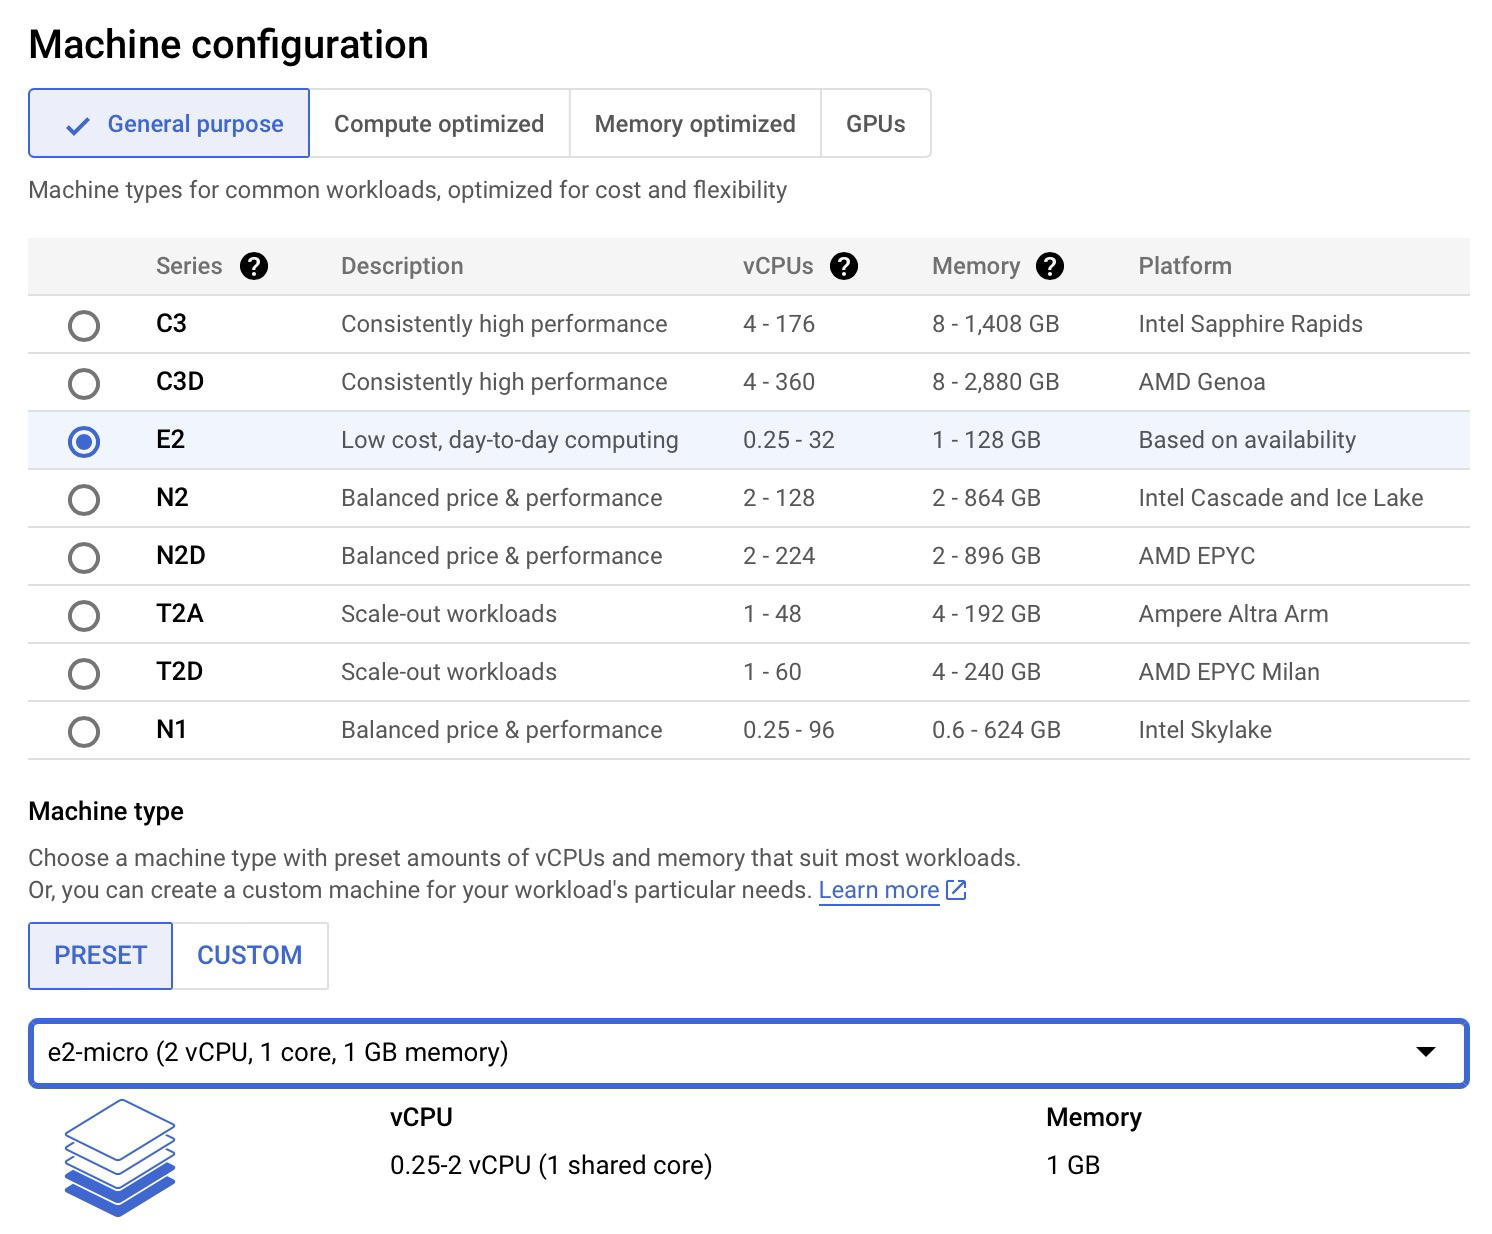
Then, scroll down and select the “E2” series and set the “Machine Type” to the free-tier “e2-micro”:
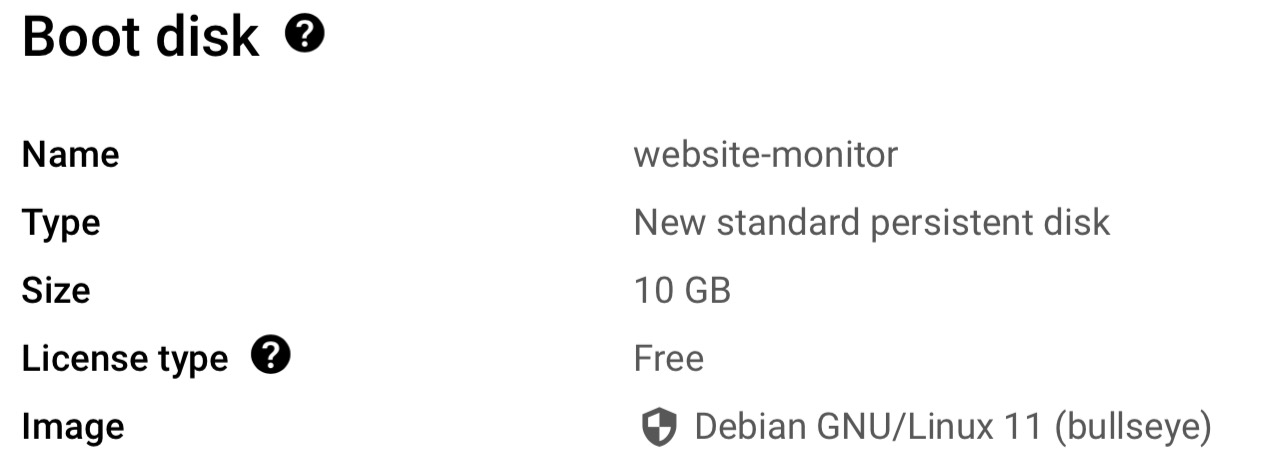
Next, make sure that your boot disk (the persistent Disk for your VM) looks something like the following. For this article, I'm using Debian Linux and decided not to change the boot disk default size of 10GB. Later, I'm going to make another boot disk just for Uptime Kuma, which will be 20GB, so everything will still be within the 30GB free-tier limitations!
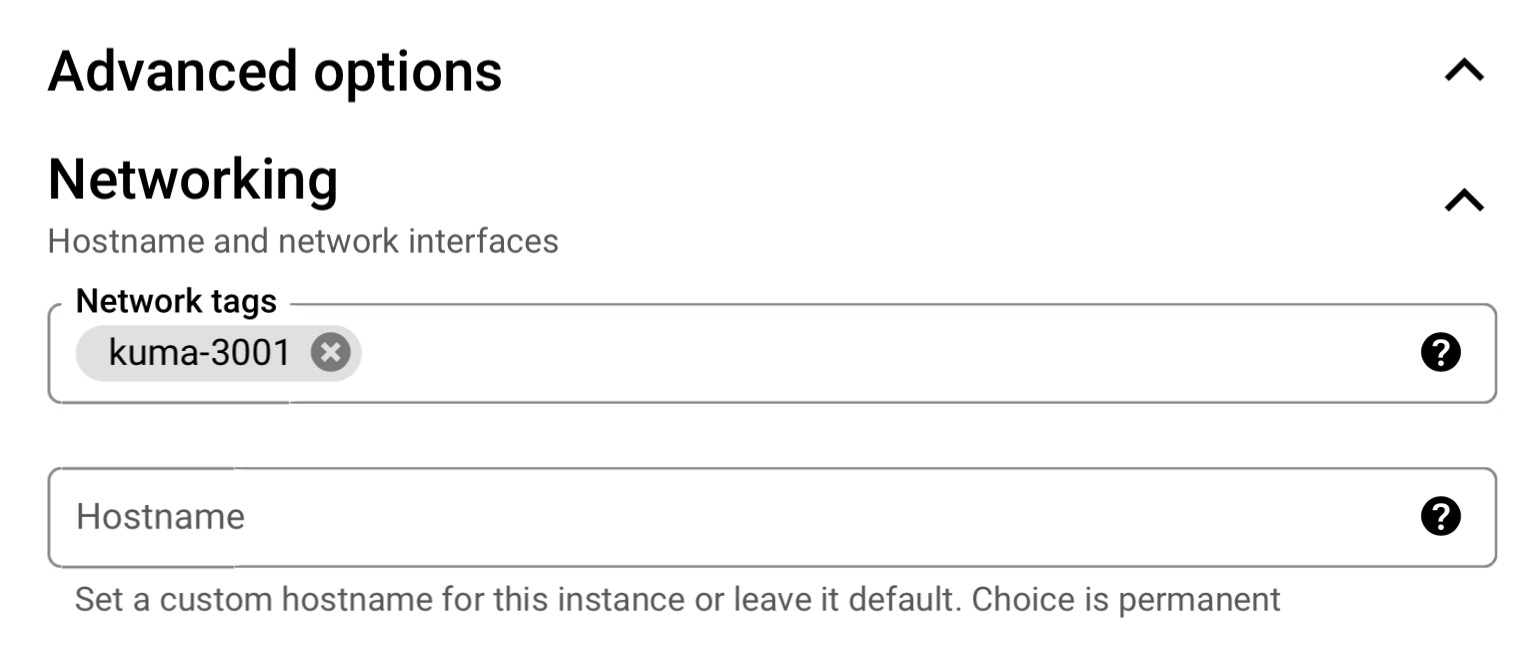
Next up - scroll down to "Advanced Options" and then go to the networking section. Once there, type in a descriptive tag name like "kuma-3001.” This tag doesn't actually exist/do anything yet, but once we've created the VM, I'll create a firewall rule with the same tag name as below to allow HTTP traffic from port 3001, which is Uptime Kuma's default port, enabling us to access the application.
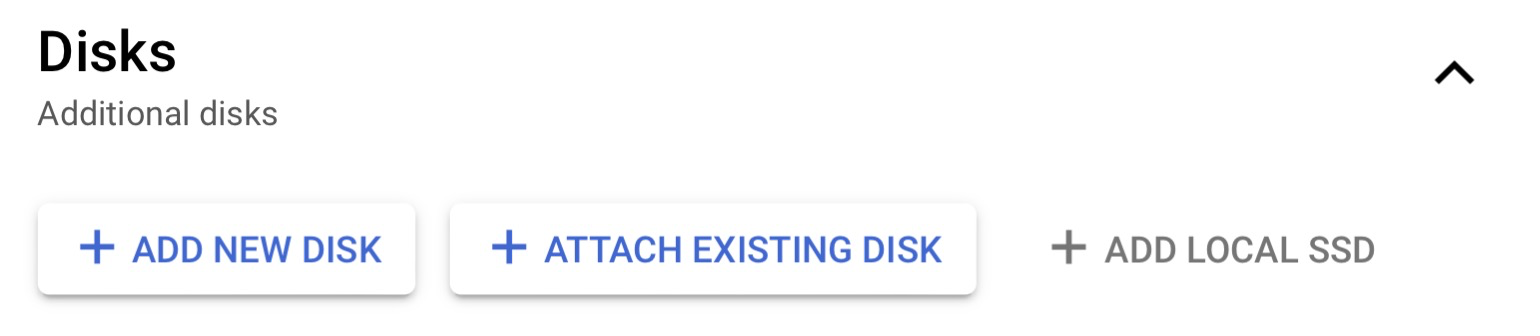
Now, we need to go to the "Disks" option under the advanced settings and click "Add New Disk." We need to create a persistent disk for Uptime Kuma to store the historical monitoring data in a SQLite database (managed by Uptime Kuma).
I then named the disk "kuma-disk," set its size to 20GB, and chose "standard persistent disk" as the Disk type. Selecting this specific disk type is important, as it's the only one Google Cloud offers in their free tier.
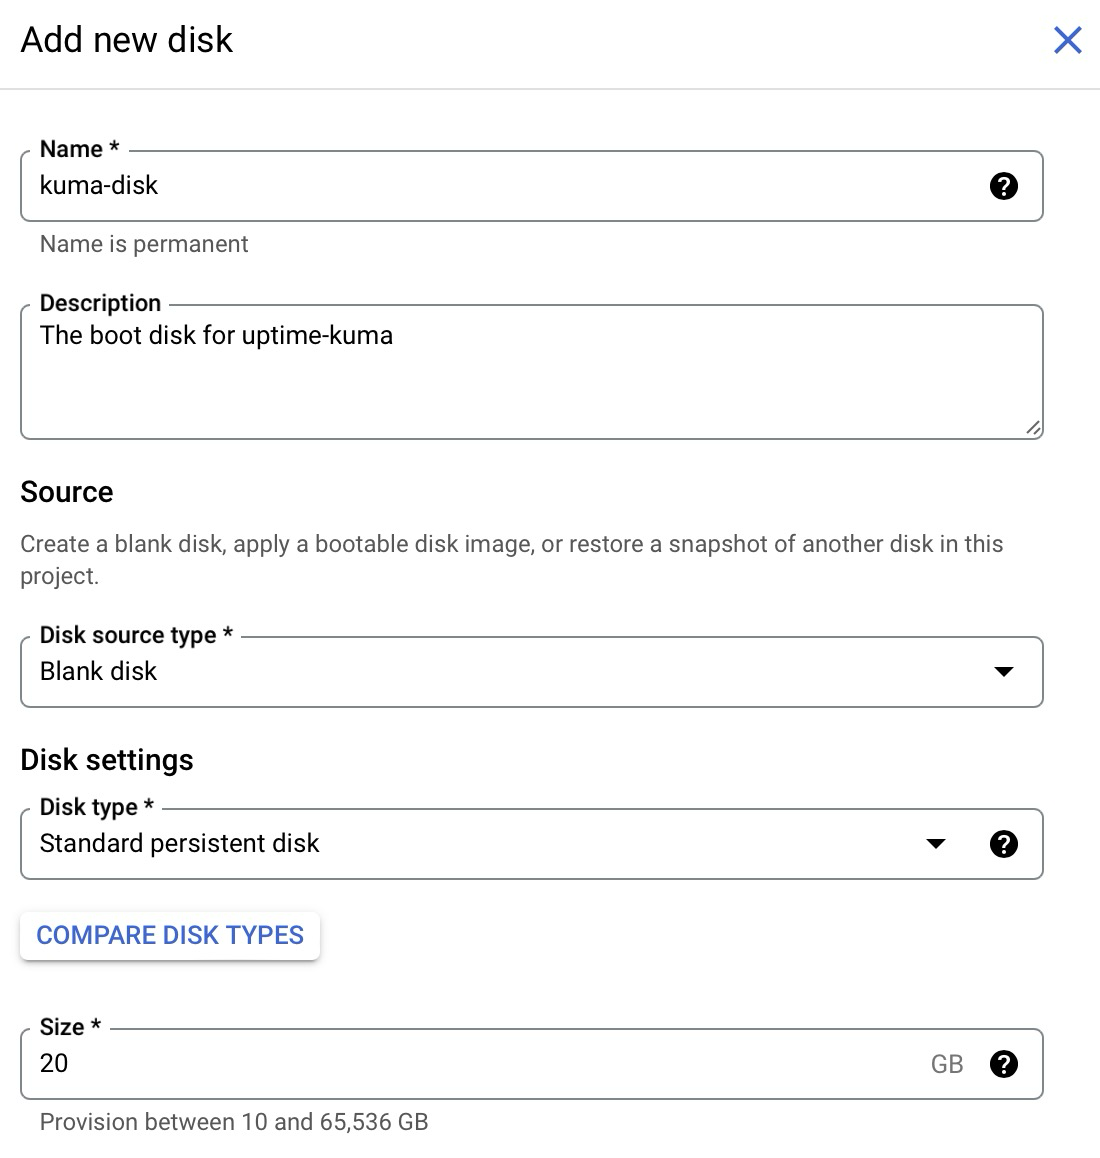
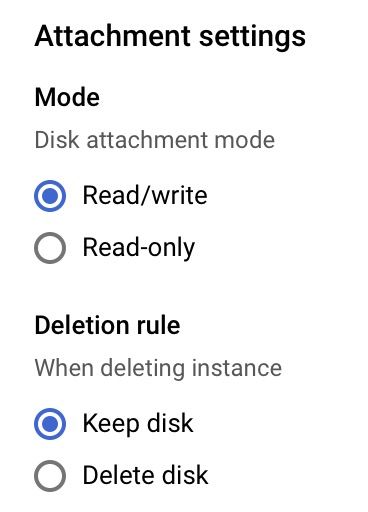
Lastly, I decided to use the following options for the disk:
Now that we've created the Disk that our Docker container will run on, we can scroll back up to the "Container" part of the Create Instance page:
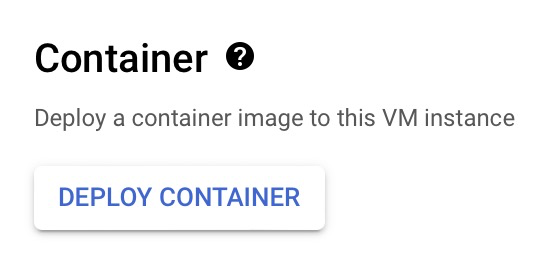
We're going to let Google Cloud automatically deploy a Docker image for us! This approach greatly simplifies the process and allows Google Cloud to handle all the heavy lifting.
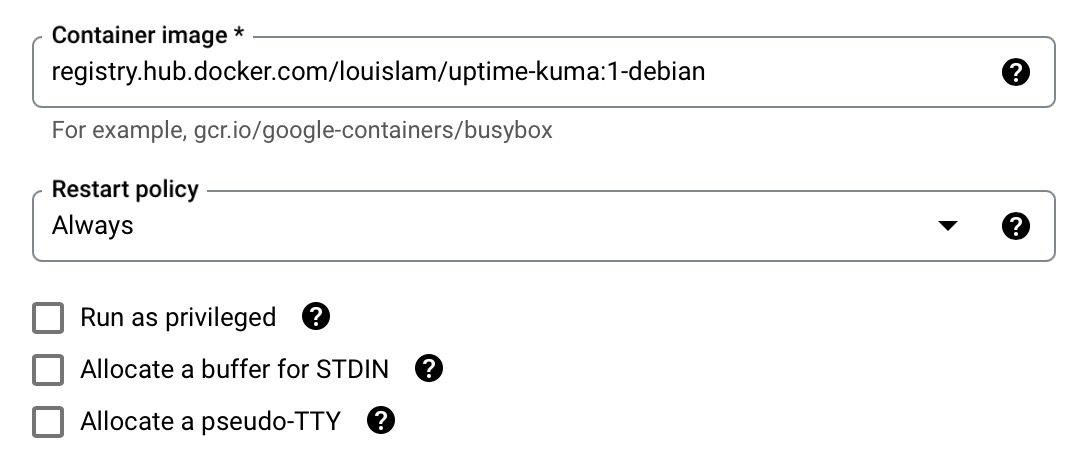
Once in the “Deploy Container” configuration page, you're going to want to set the container image to:
registry.hub.docker.com/louislam/uptime-kuma:1-debianThis URL will use the uptime-kuma docker image from Docker Hub, and since our VM is running on Debian, I'm using the "1-debian" Docker tag.
Then I set the “Restart policy” to “always,” which tells Google Cloud to automatically attempt to restart the server on a reboot or crash!
Then, because Uptime Kuma stores data in that SQLite database I mentioned earlier, we need to mount the disk we made to the Docker container. Set the “Volume Type” to “Disk” and the “Mount path” to “/app/data” - the standard mounting path for UpTime Kuma. Then, enter the name of the Disk you created, which I named “kuma-disk” a few paragraphs above. Finally, I set the “Mode” of the disk to “Read/write”.

And that's it! Now click Create, and we'll move on to allowing traffic from port 3001.
Update Firewall Settings
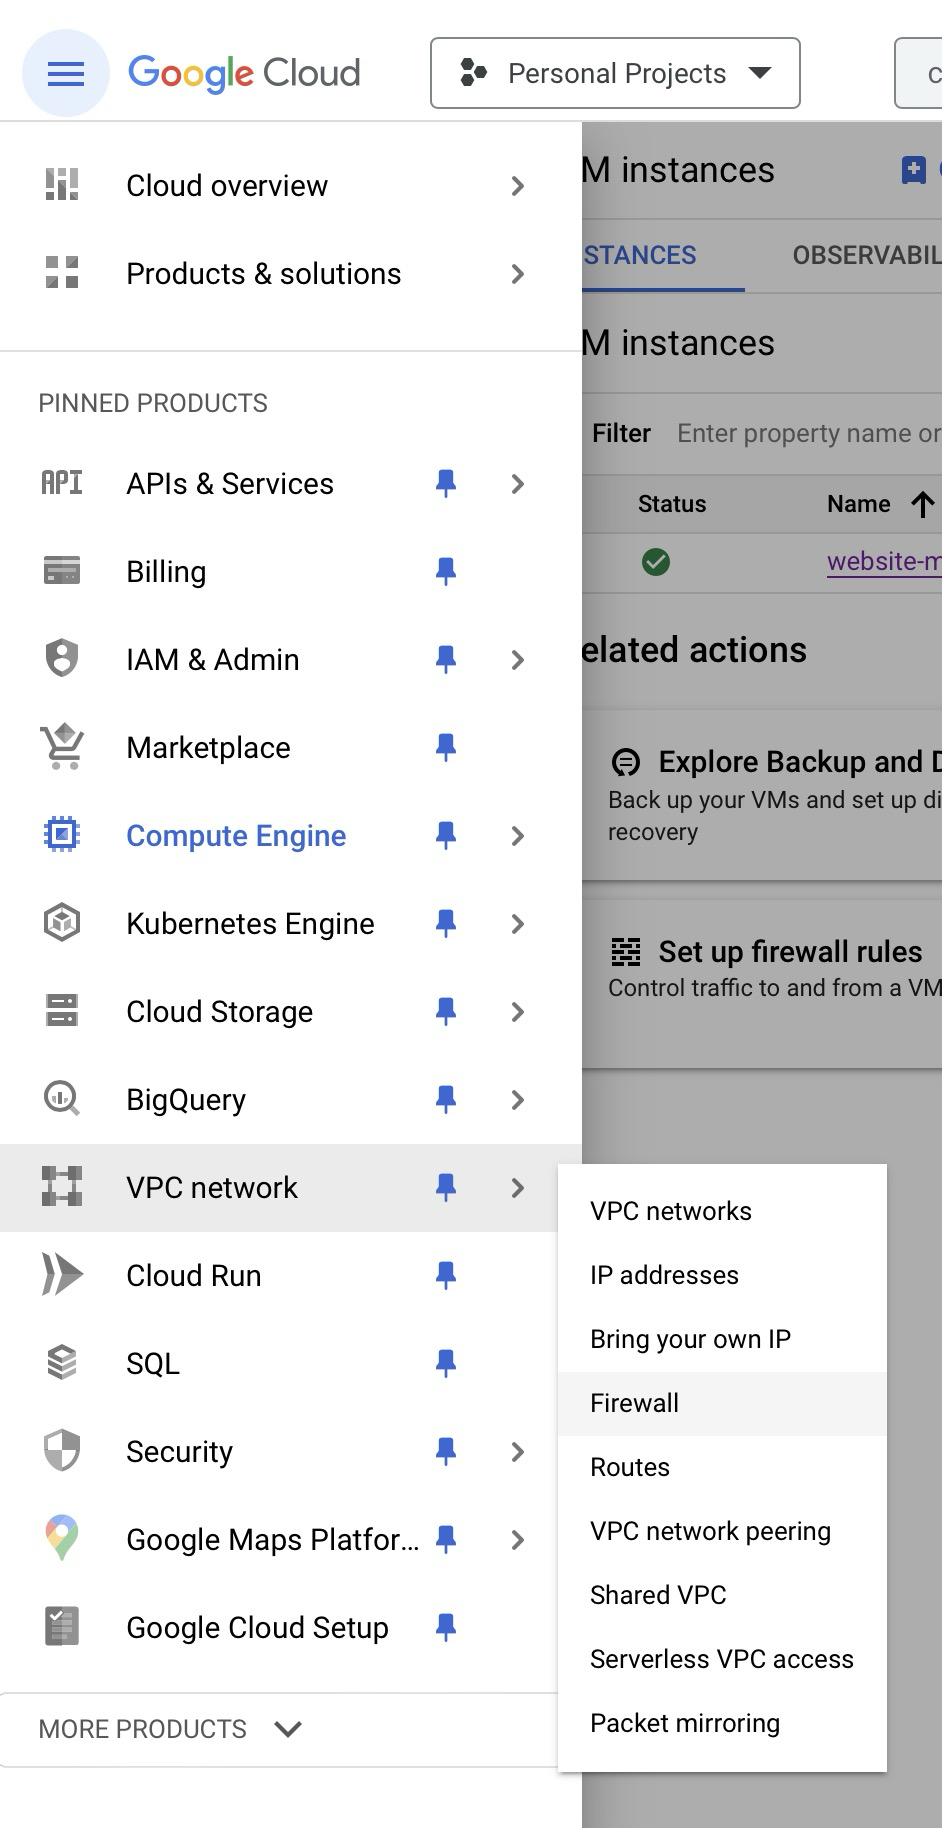
To add the “kuma-3001” firewall rule that we already added to the VM, go to the hamburger menu, VPC network, and then Firewall:
Then click “Create Firewall Rule”.

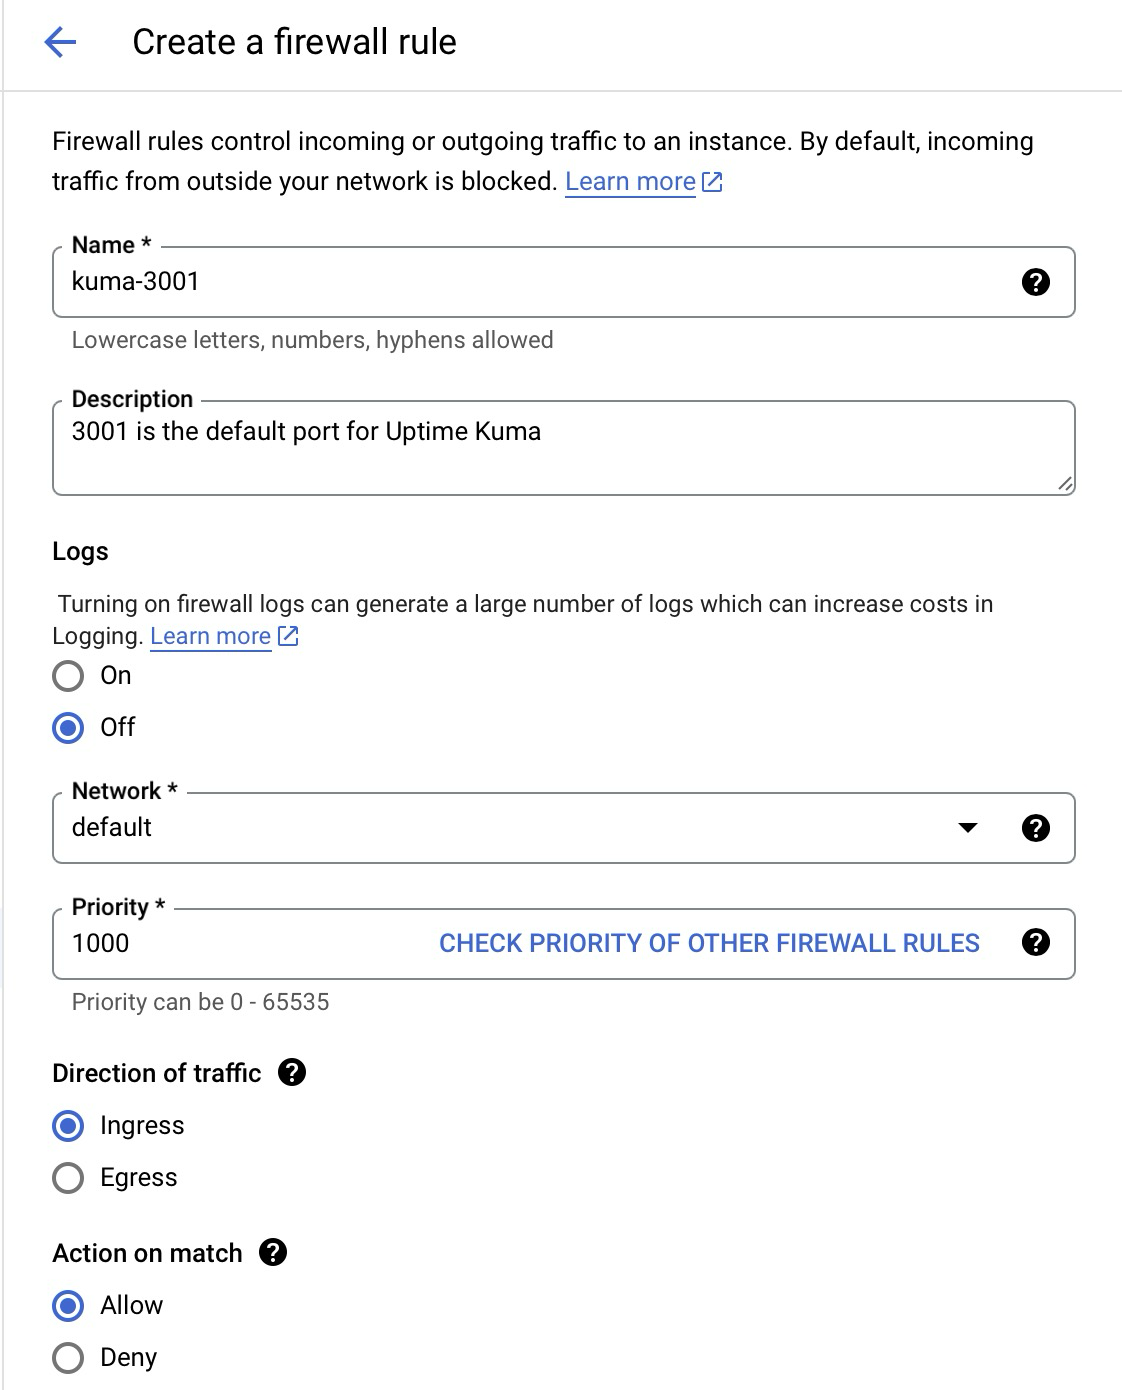
Then set the name, maybe a description, and keep everything else the default (for the first part):
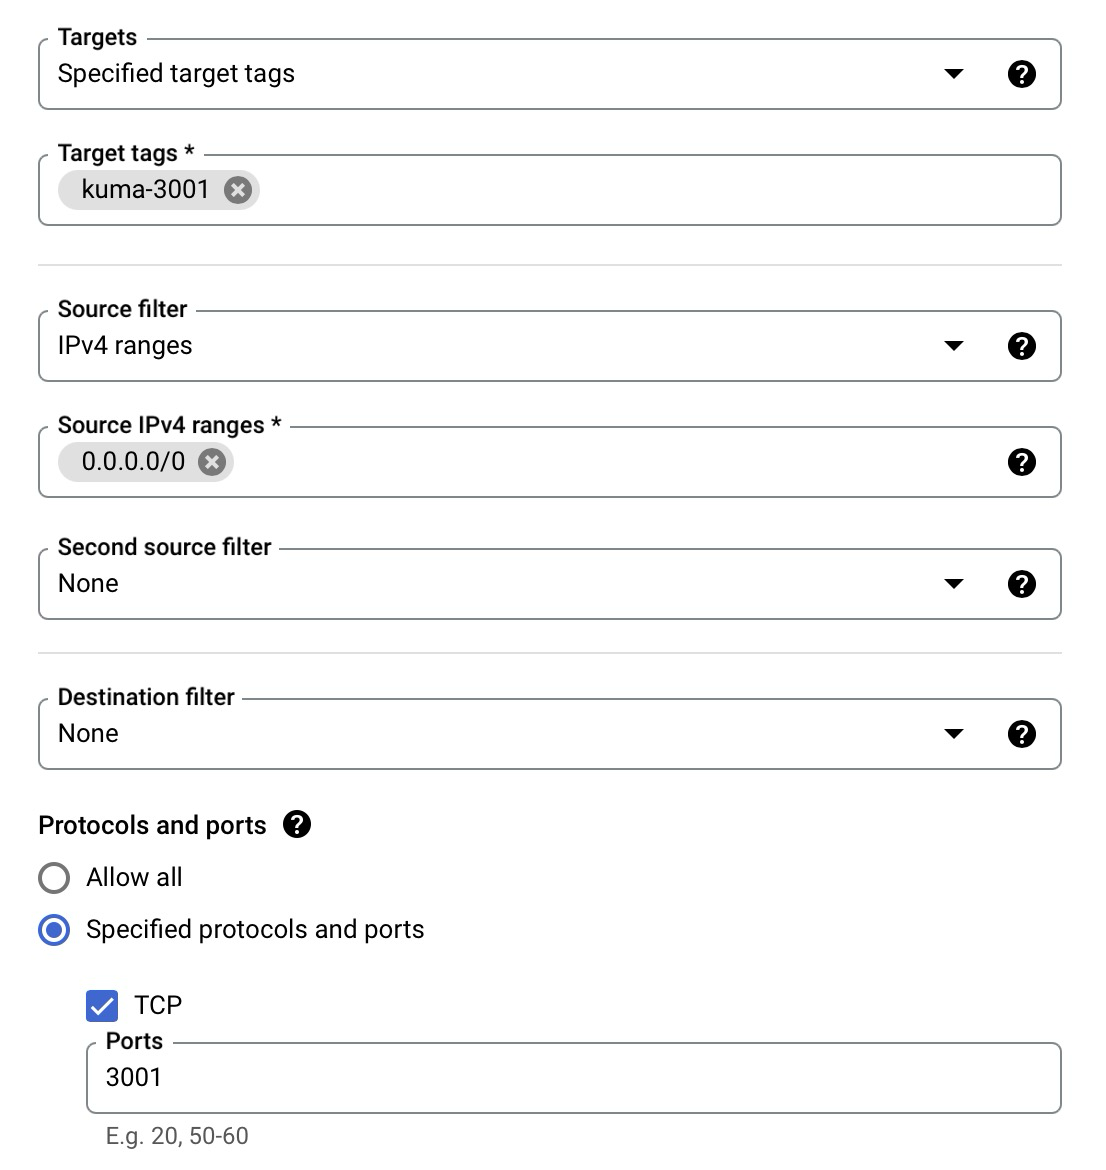
Now scroll down a bit, set the tag to "kuma-3001," and set the source filter to IPv4 ranges. Then, set the range of IPv4 addresses to everything, which is "0.0.0.0/0." Next, add the port 3001 to the TCP option like in the image below:
Finally, click "Create" and you should be able to access Uptime Kuma on port 3001 of your server!
Create a Website Monitor
To access Uptime Kuma, go to the “External IP” of your VM on port 3001 like such (and no.. the below IP address doesn't point to my Uptime Kuma instance anymore):
http://34.31.211.106:3001This should lead you to the following screen:
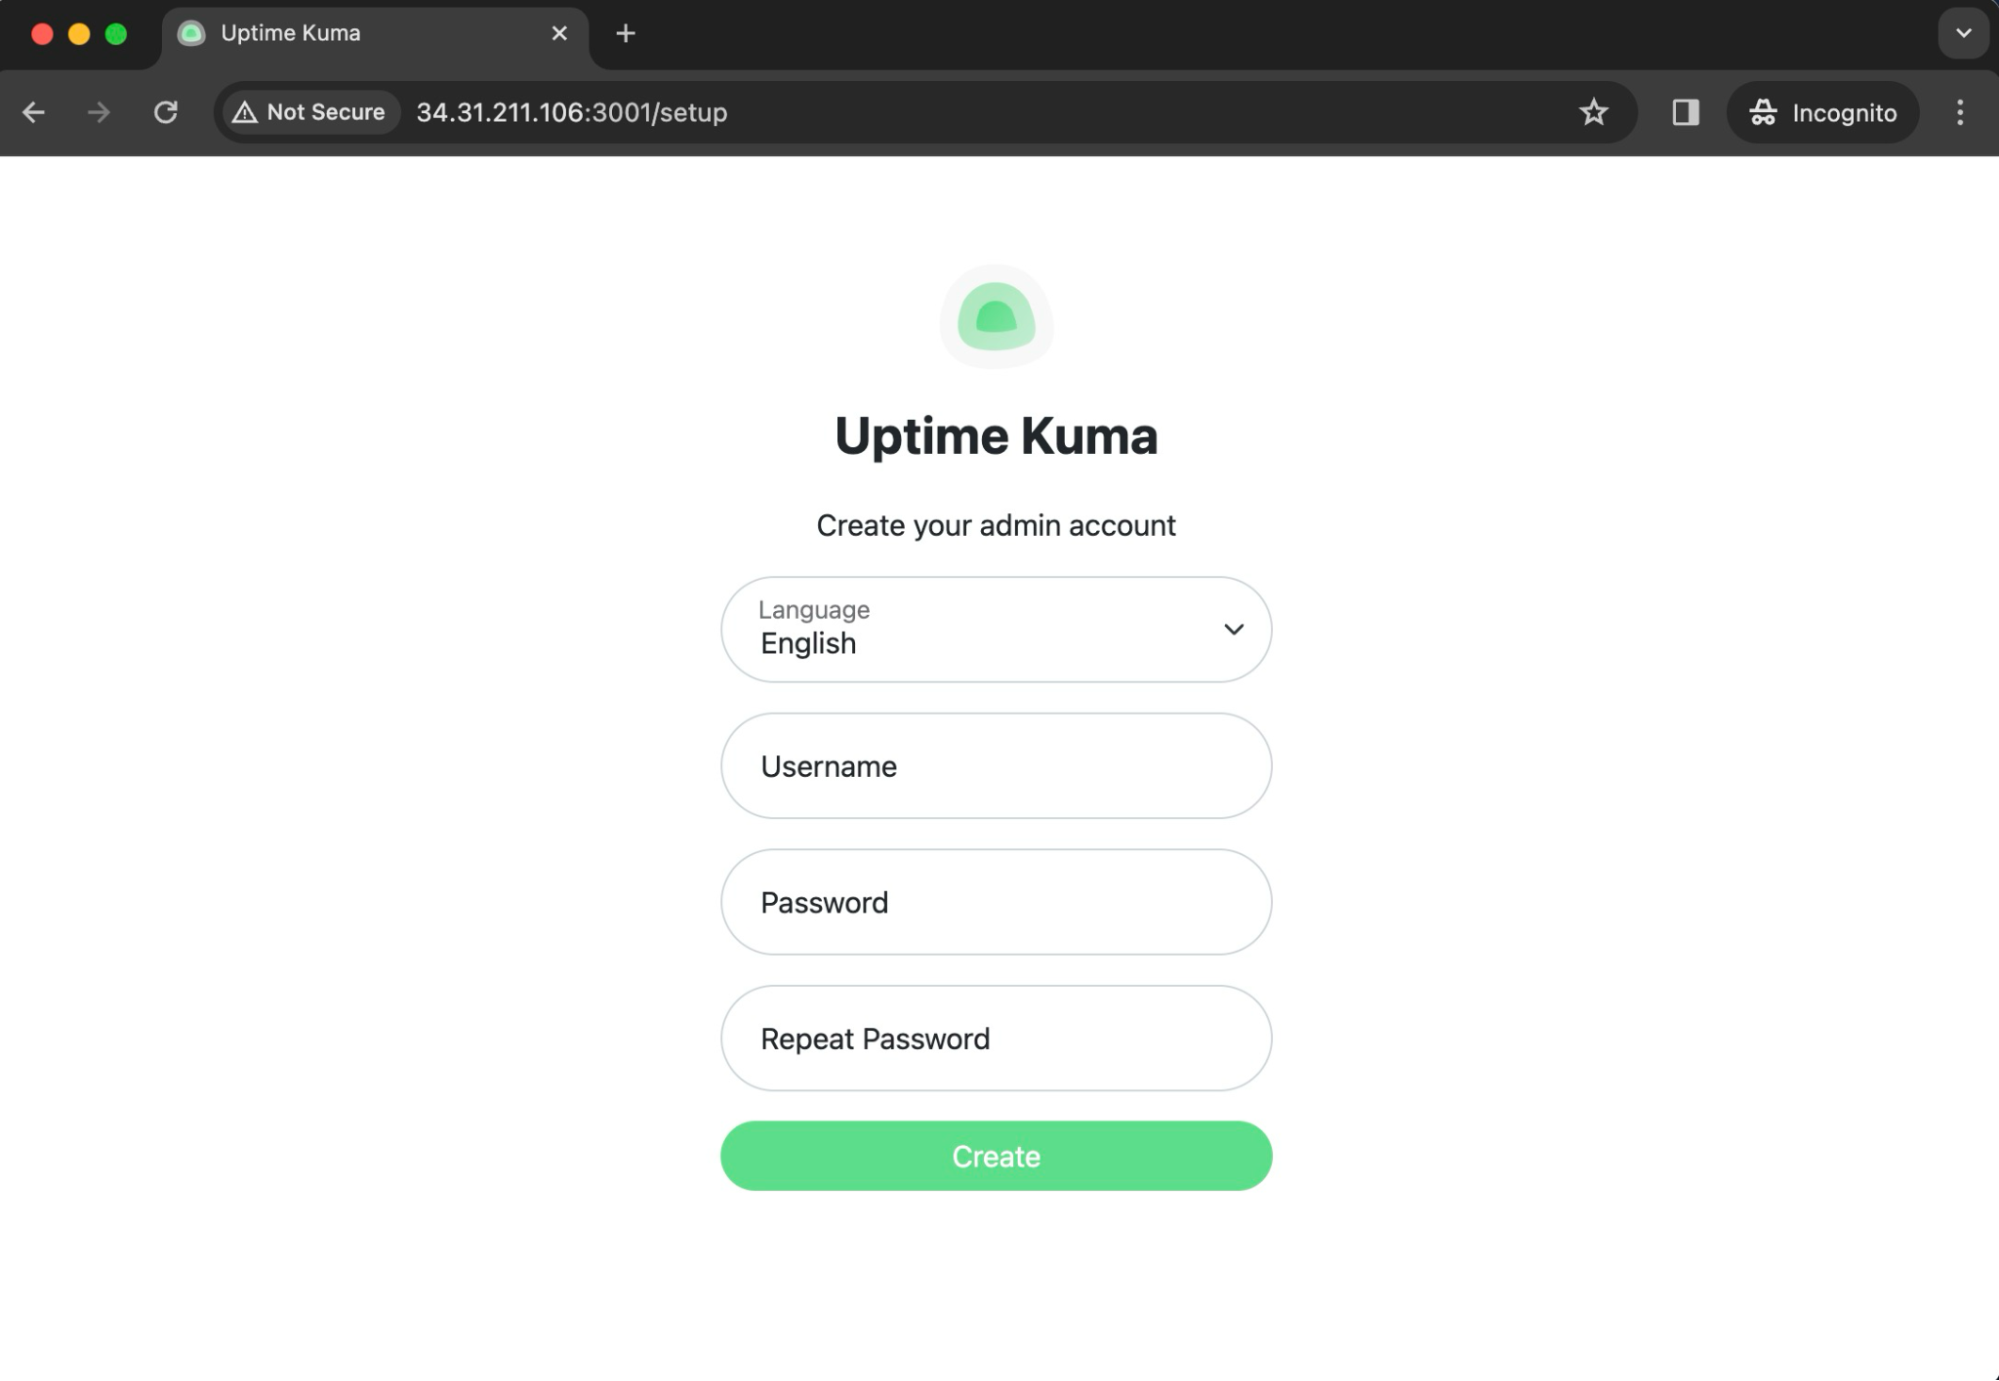
After creating an account, you should see this page, which will store all of your monitors:
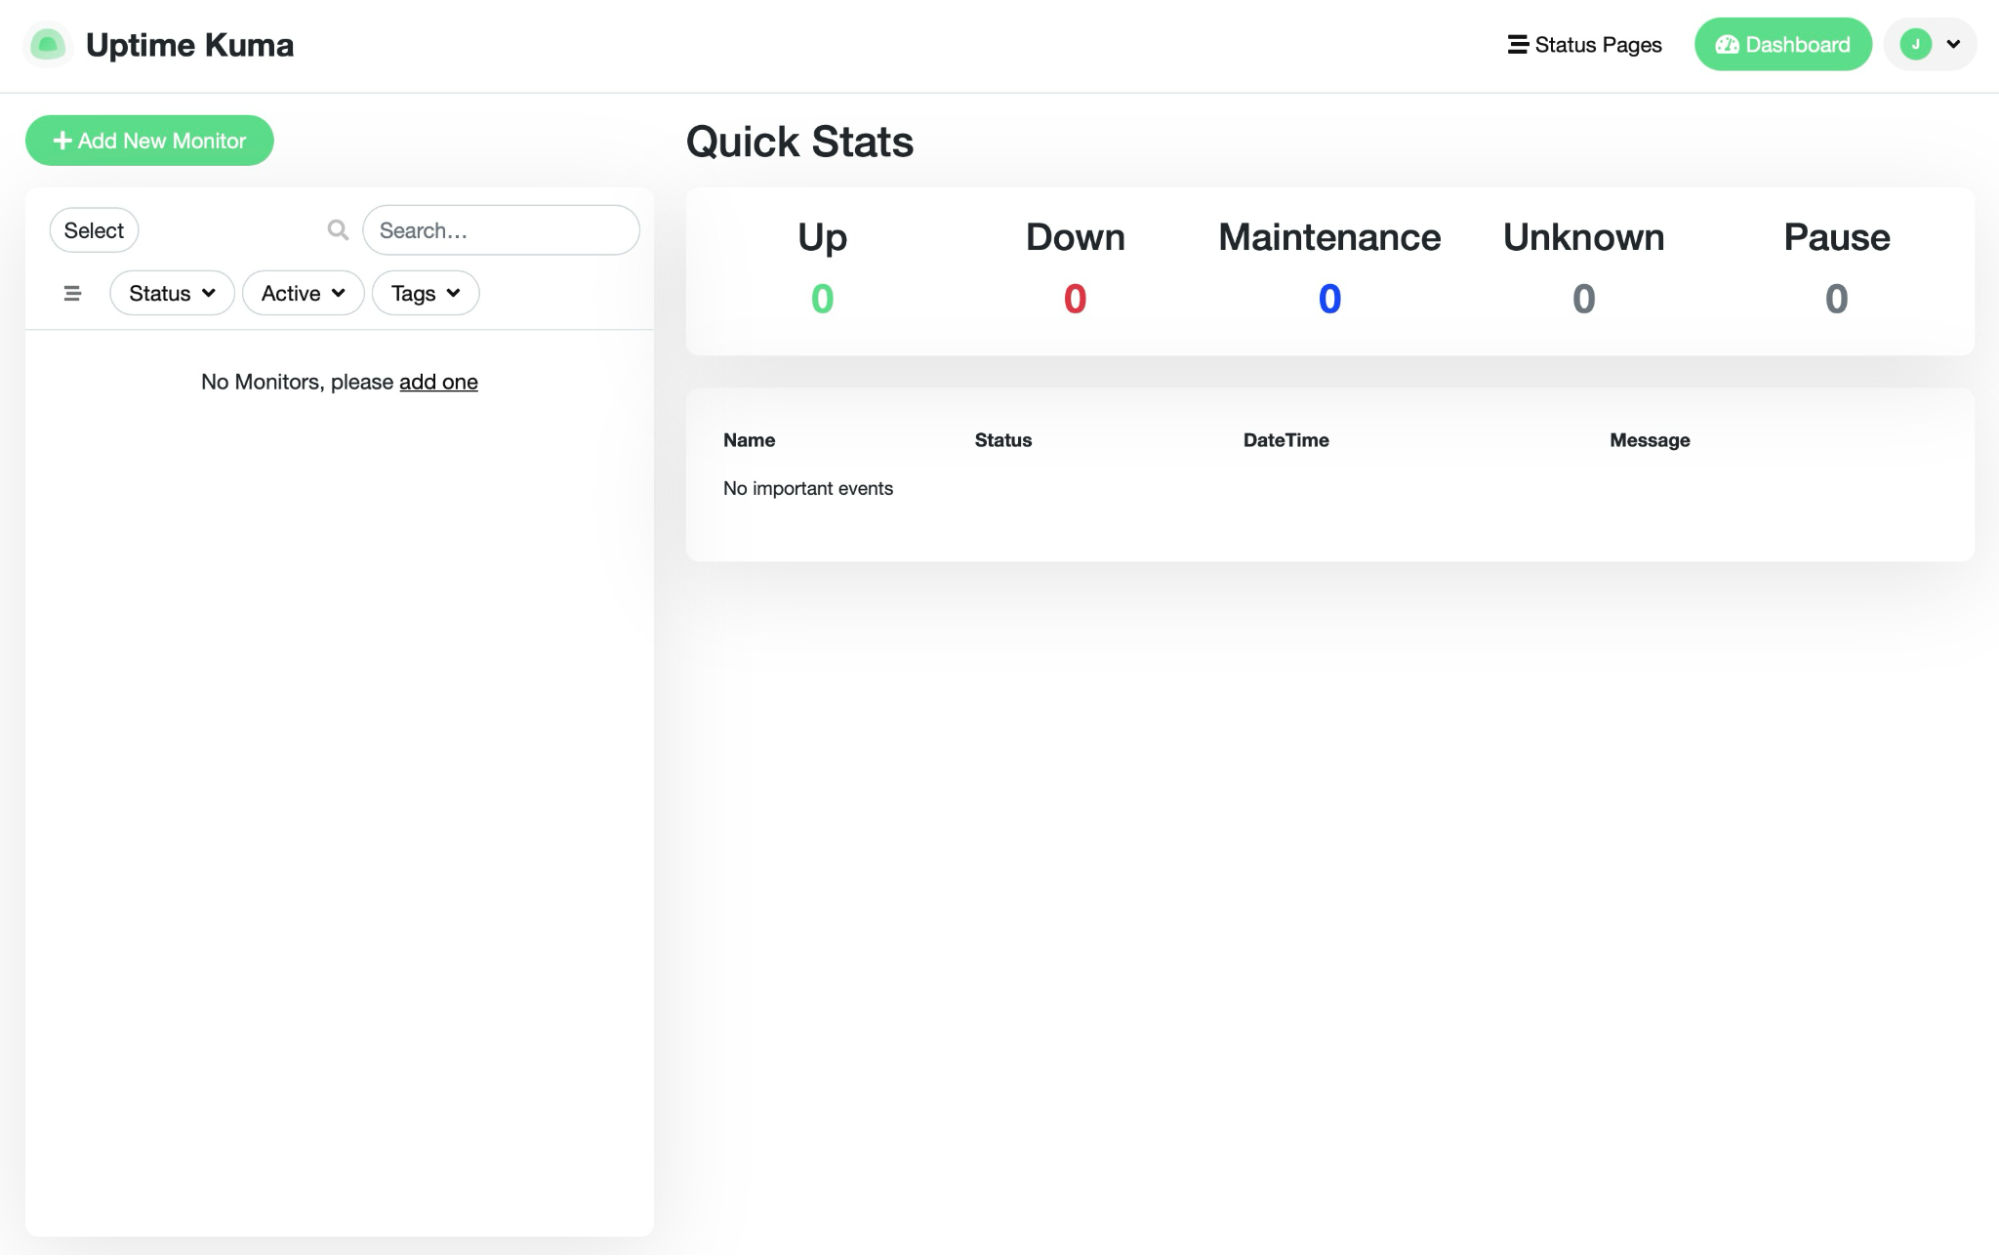
For the rest of the article, I'm going to be discussing how to create a monitor for my website to make sure that it's up and running. If it's not, I'm going to set up Slack notifications so that I'll be notified if a disaster ever happens.
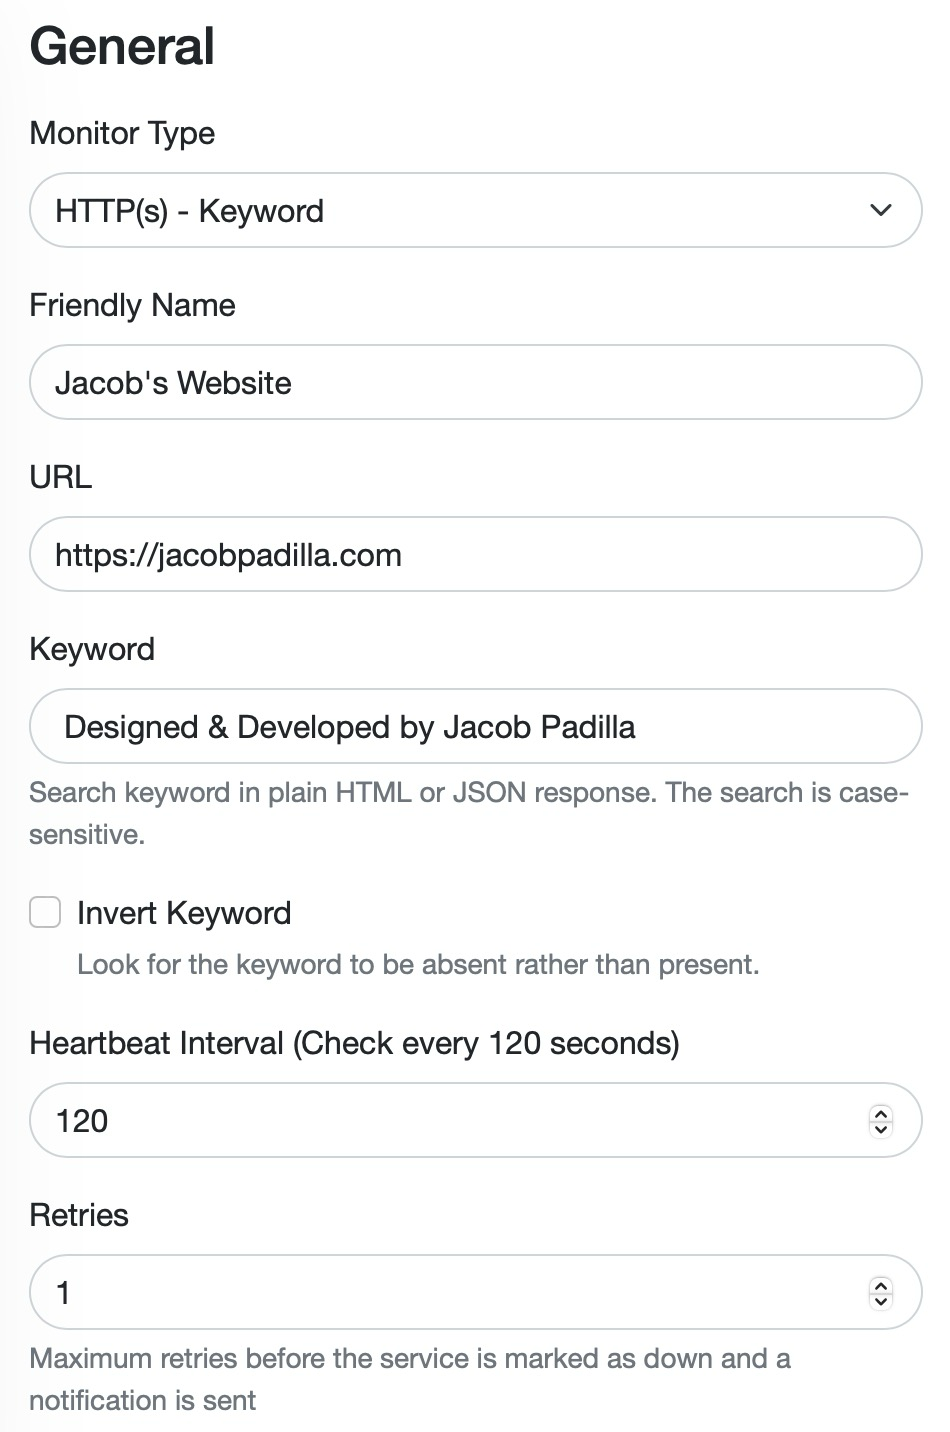
While I'm going to be setting up a website monitor, Uptime Kuma can monitor pretty much anything! Nevertheless, for monitoring a website, click "Add New Monitor" and then select "HTTP(s) - Keyword" under "Monitor Type." This option will periodically send an HTTP request to your website and then try to match a keyword from the HTML response. The "Heartbeat" is the frequency of these HTTP requests, and "Retries" is the number of times to attempt the HTTP request. I set these values to 120 (seconds) and 1, respectively.
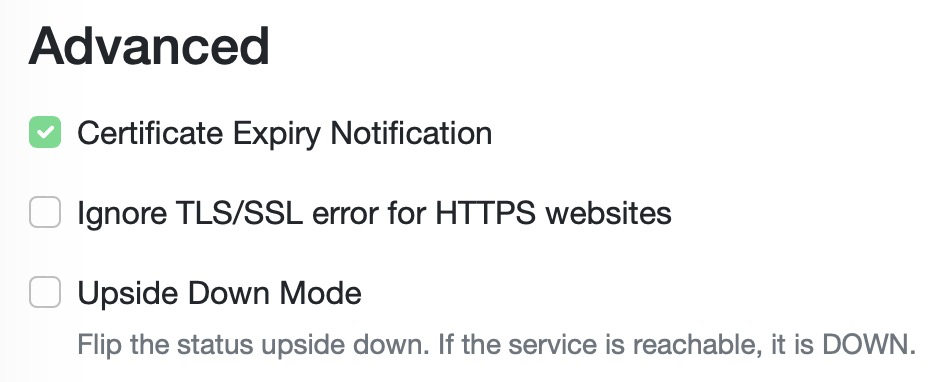
You can also get alerts regarding SSL certificate expiration!
Simple Slack Notifications
Now, I'm going to set up Slack notifications. I chose Slack primarily because it's an easy, free solution for instant notifications, and I already have Slack on my phone.
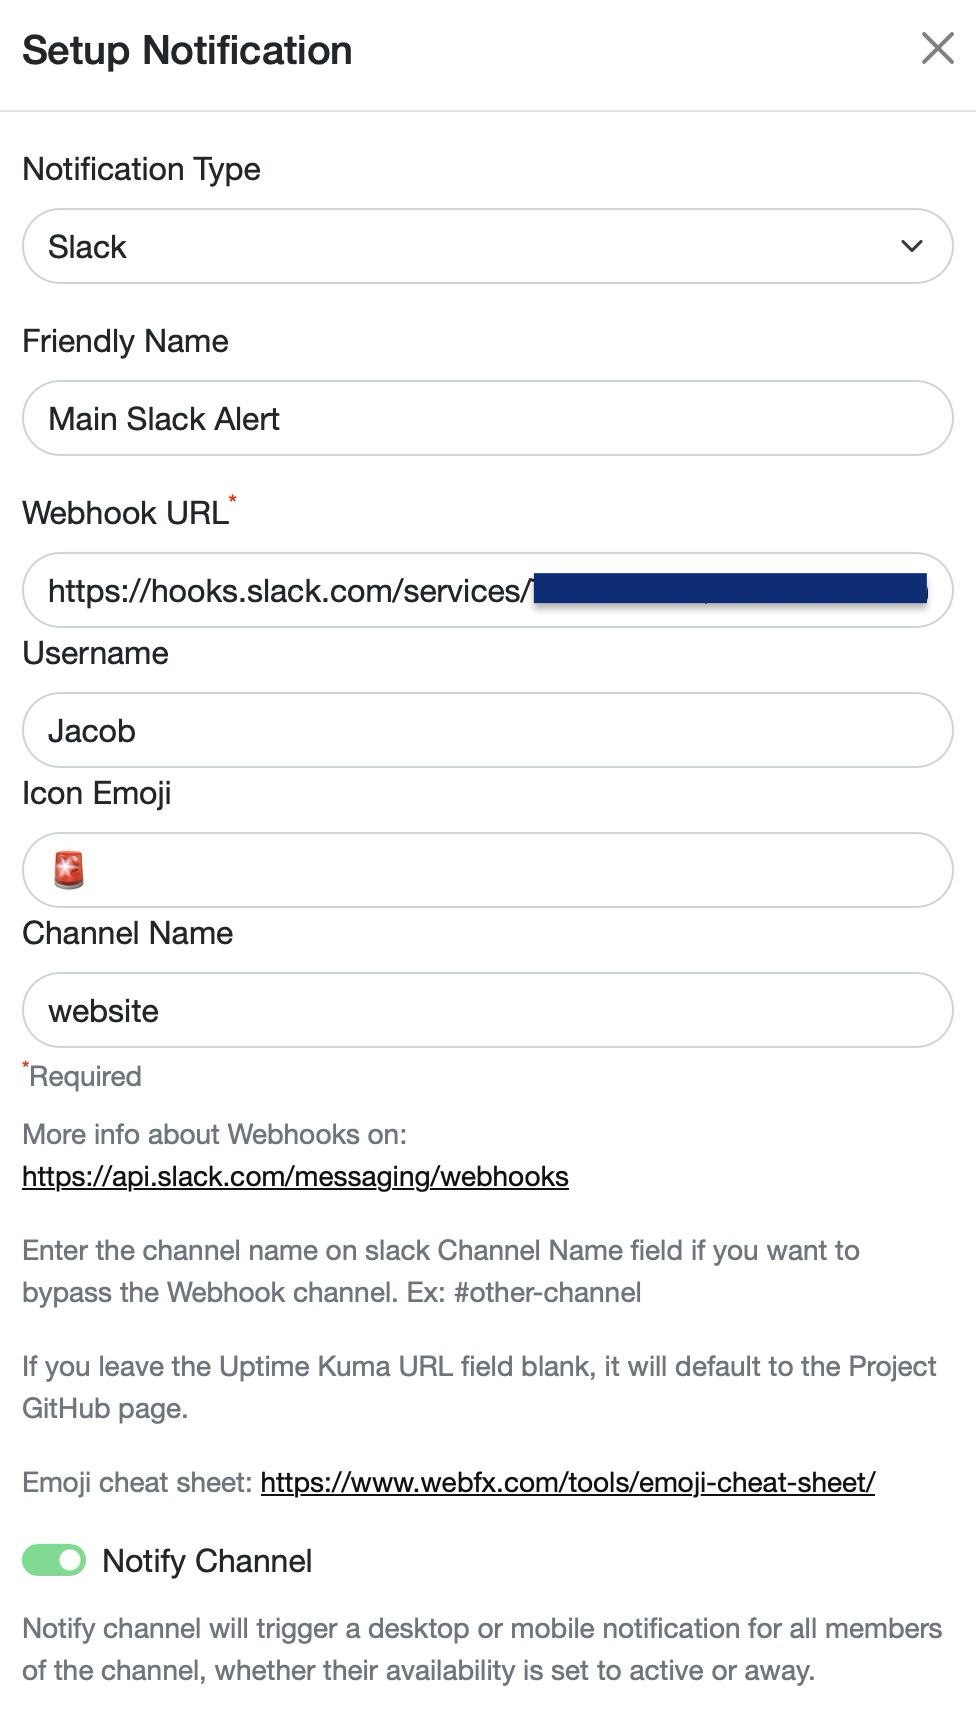
To set this up, click the notification button in the Uptime Kuma monitor creation page and select “Slack” as the notification type.
To allow these notifications to go to Slack, we'll need to enable Slack WebHooks. To do this, go to the Apps page on the desktop or the browser version of Slack by clicking "More" on the right side of the interface and then "Apps." Then type in "webhooks," which should result in the following app showing up:
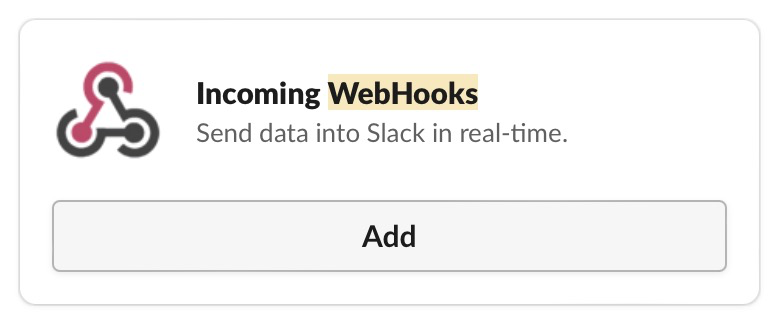
When you click “Add” you'll need to enter a Slack Channel in which you want the notifications from Uptime Kuma to be sent to. I created a new Channel for this called “website”.
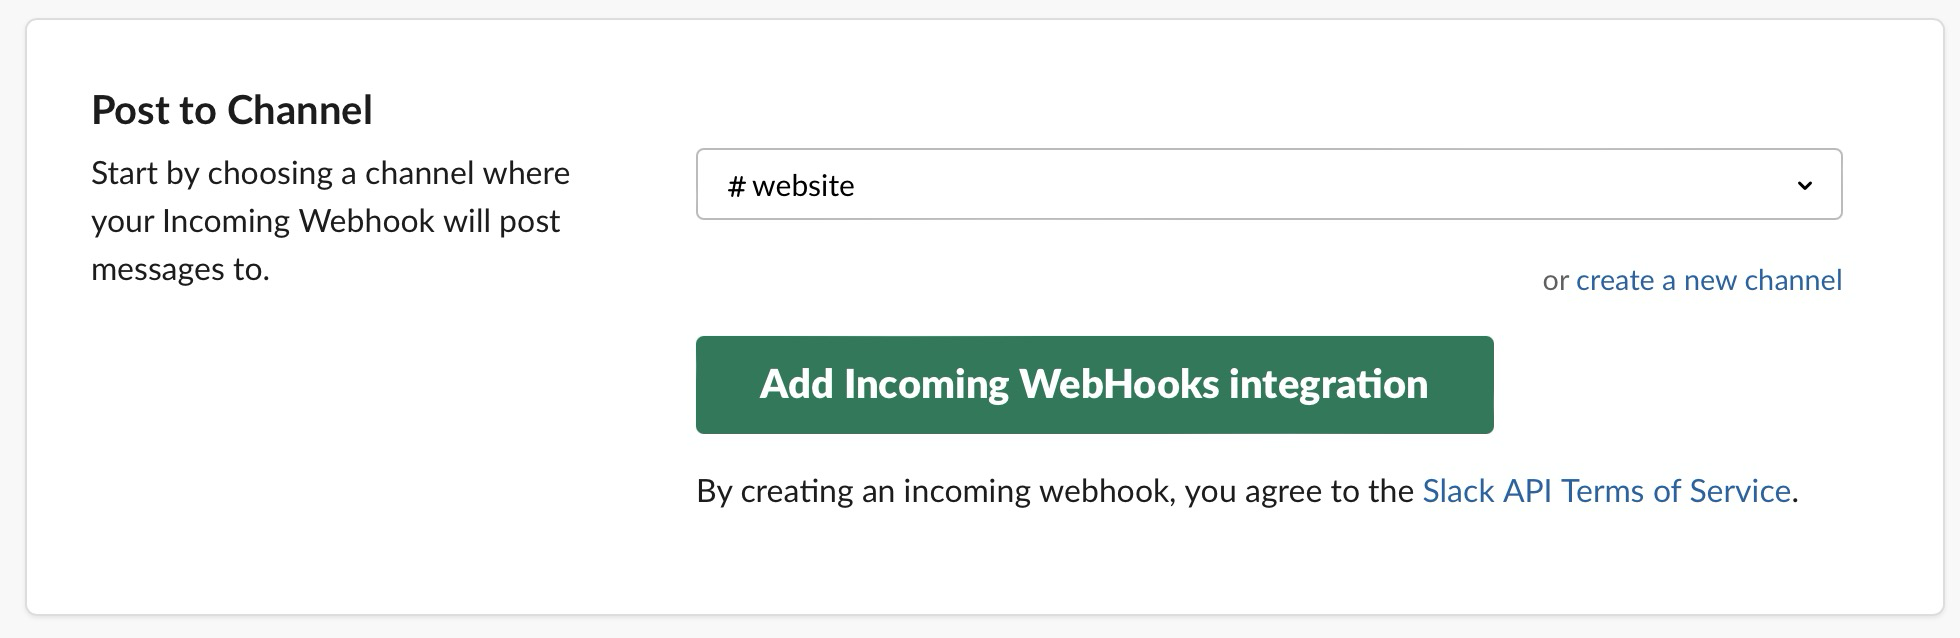
Once you've added the Webhook on the Slack webpage, you'll be given a WebHook URL. Copy and then paste it into Uptime Kuma, along with the name of the Slack channel:
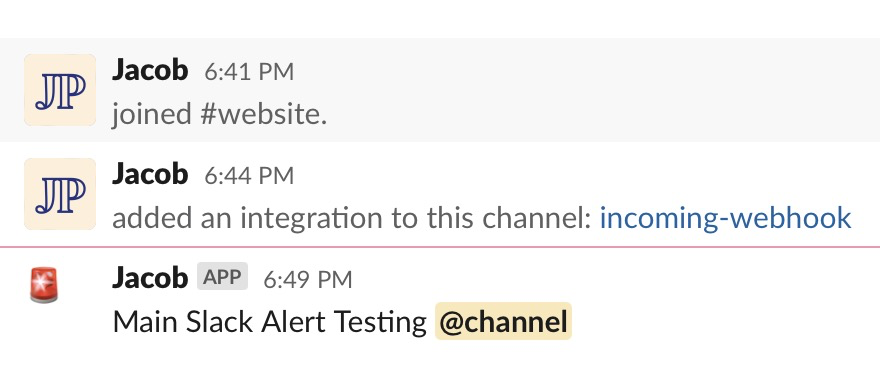
And now, when clicking the "Test" button, we get our Slack notifications!
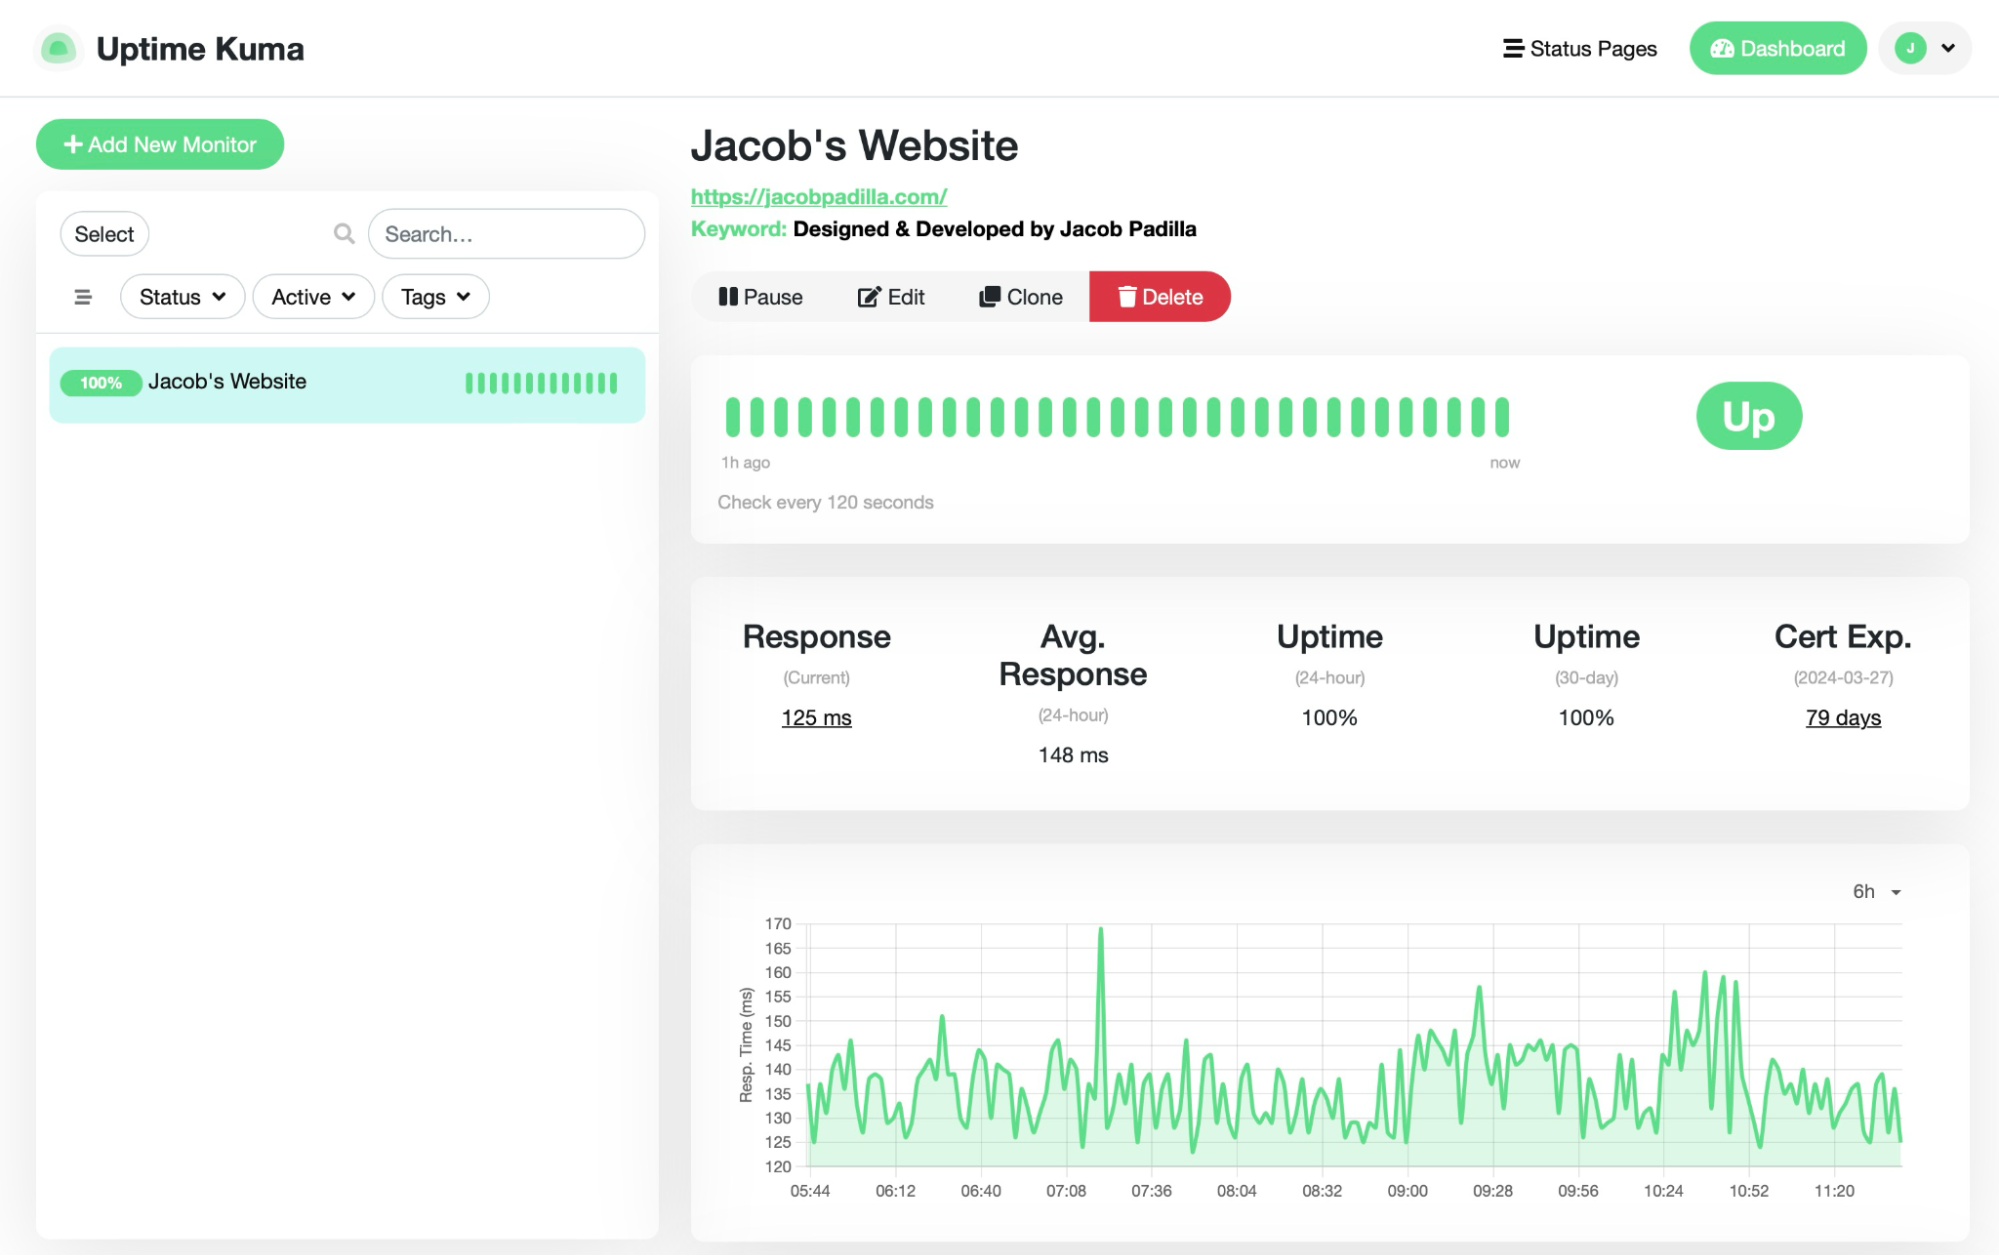
And that's it - once you create the monitor you'll see it in your home page where, by default, you get a nice graph of the request response time:
Final Thoughts
I wrote this article while setting up monitoring for my website, and hopefully, I've convinced you that it's really easy (and free) to set up monitoring for your own websites/projects as well! Instead of constantly checking that your webpage is up, you can sleep well knowing you'll be notified almost instantly if anything ever goes down.