A Step-By-Step Guide To Web Scraping
Posted on • Last updated on
Web scraping might seem daunting initially, but there's a method to the madness. By understanding the underlying structure of websites and how APIs work, you can boil scraping most websites down into just a few simple steps! In this article, I've taken the mental model I use when scraping data from websites and laid it out in a step-by-step guide.
Static vs. Dynamic Websites
The first step when building a scraper is figuring out how the data is being loaded onto the website. Data can be loaded statically or dynamically.
A static website is one in which the website content/data is sent already embedded into the HTML. In other words, when you send a GET request to the URL containing the data you're after, the response is the entire HTML for that page with all the data already in it. While getting the HTML from a static website is generally straightforward, parsing that HTML can be a bit of a headache and is prone to changing when developers update their website.
On the other hand, a dynamic website changes while you are using it. The data isn't sent already inside of the HTML, but rather, Javascript makes a request to an API, which returns data that then gets turned into HTML elements and displayed on the website. An example of a website that uses a dynamic approach would be Instagram. When you scroll through your feed on Instagram, API requests are being made to fetch new images in the background as you scroll.
While configuring the request to a private API can sometimes be tricky, once you are able to use the API, it comes in nicely formatted JSON and is less likely to change since changing an API would likely break their own website.
An Easy Way To See Where Your Data Is Coming From
The first thing you need to do when web scraping is to figure out where the data is coming from! Is it coming from a private API, or is it already embedded into the HTML?
This is actually very easy to figure out! Just follow the steps below:
- Open Inspect Elements in Chrome
- Go to the Network Tab
- Clear the Request History by clicking the circle with a slash, in the upper left corner
- Refresh the page so that you have a clean view of all of the requests
- Using the search feature, type in the data that you want to scrape to see what request it’s coming from!
Example of a Dynamic Website
I’ll demonstrate the method with the Whole Foods online ordering website, which (spoiler alert) dynamically loads the data we want.
Let’s say you want to get data on food prices, specifically avocados. Let’s follow the five steps outlined above:
First, I open the Chrome Inspect Elements tool, go to the Network Tab, and then click the circle with a slash clear the current request history:
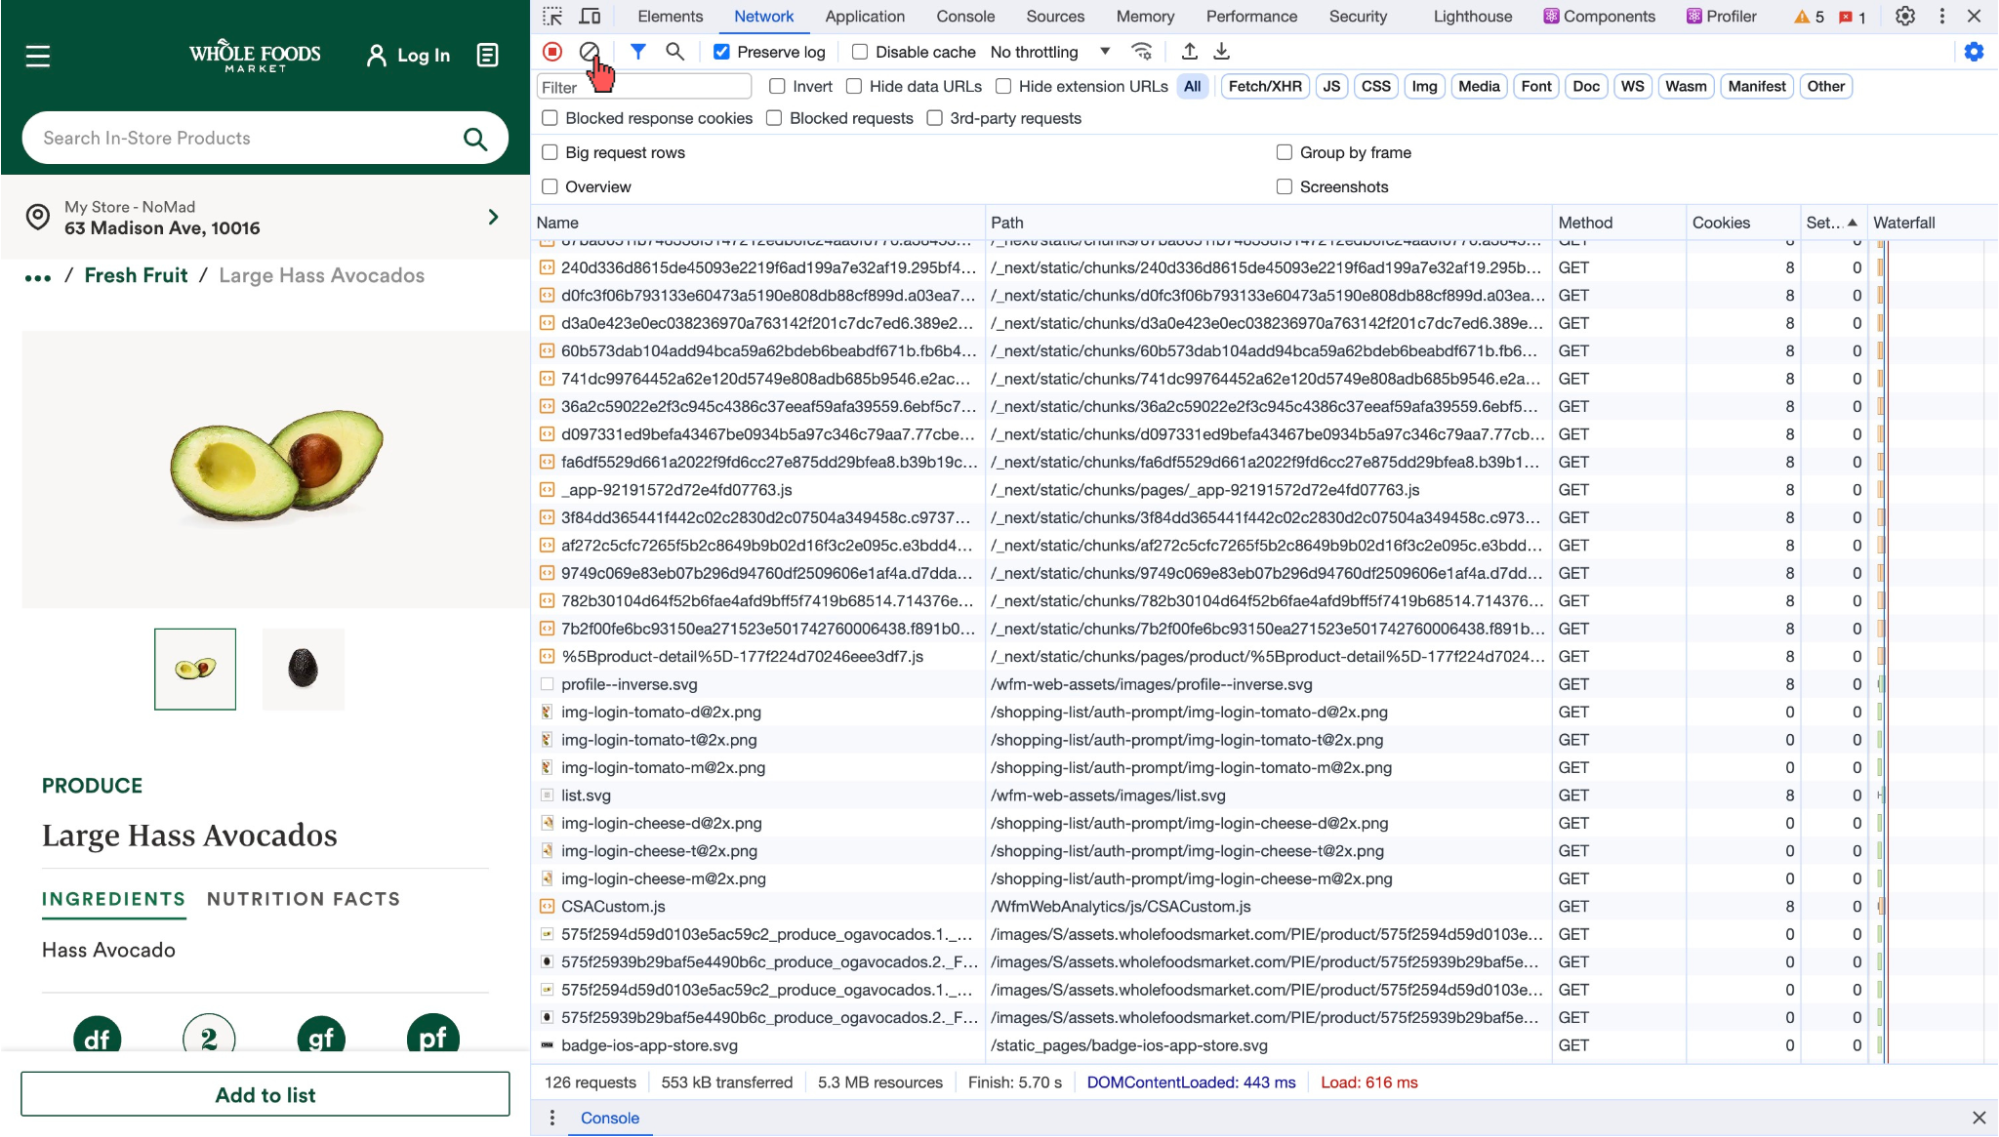
Next, we refresh the page to get a clean request history for only the current page.
Then, we can click on the magnifying glass icon to the right of the button we just pressed to initiate a search. Next, start typing in the data that you want to eventually get. Since we want to scrape avocado prices, we are going to type in “2.49” because the website, in the screenshot below, displays the price as such:
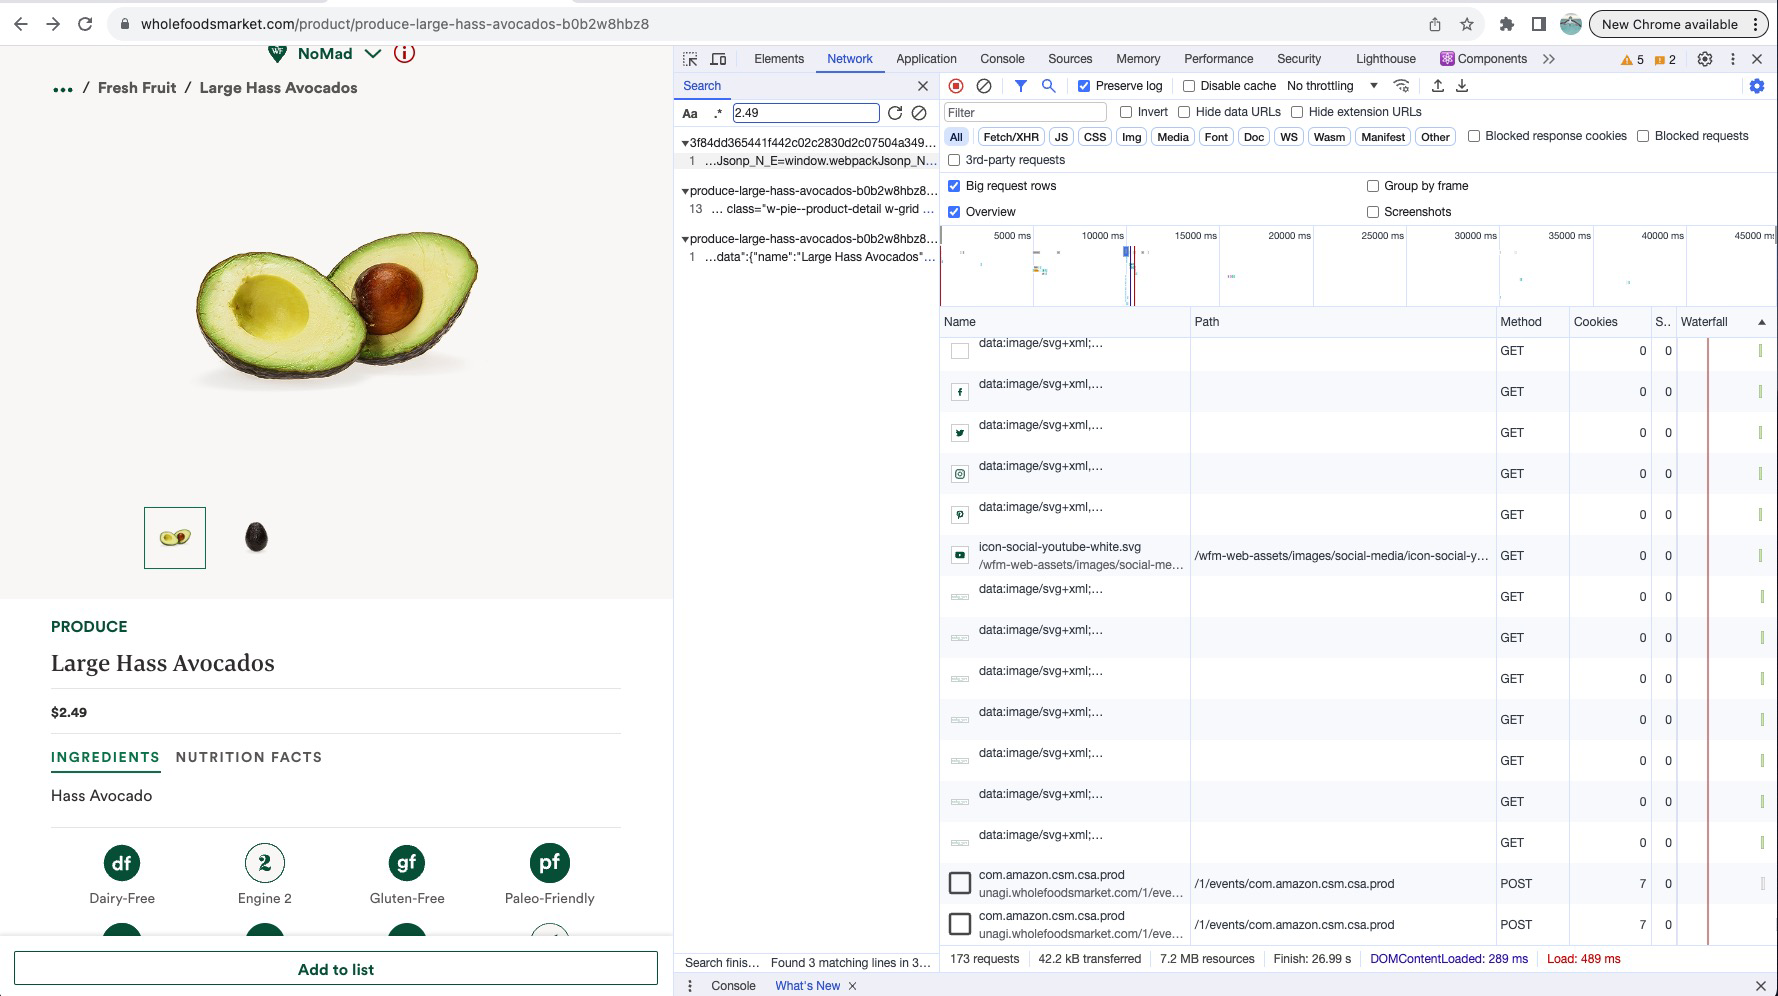
Three requests match the number (avocado price) that we want to scrape. Looking a bit closer, we can see that the first two matches are just coincidences that do not have the data we are after, but the bottom result is an API that returns the price of an avocado in a clean JSON format!
This is exactly what we want since now we can easily reverse engineer the API to get prices of avocados and probably all of their other food.
We'll return to the Whole Foods example, but now let's see what a Static website looks like.
Example of a Static Website
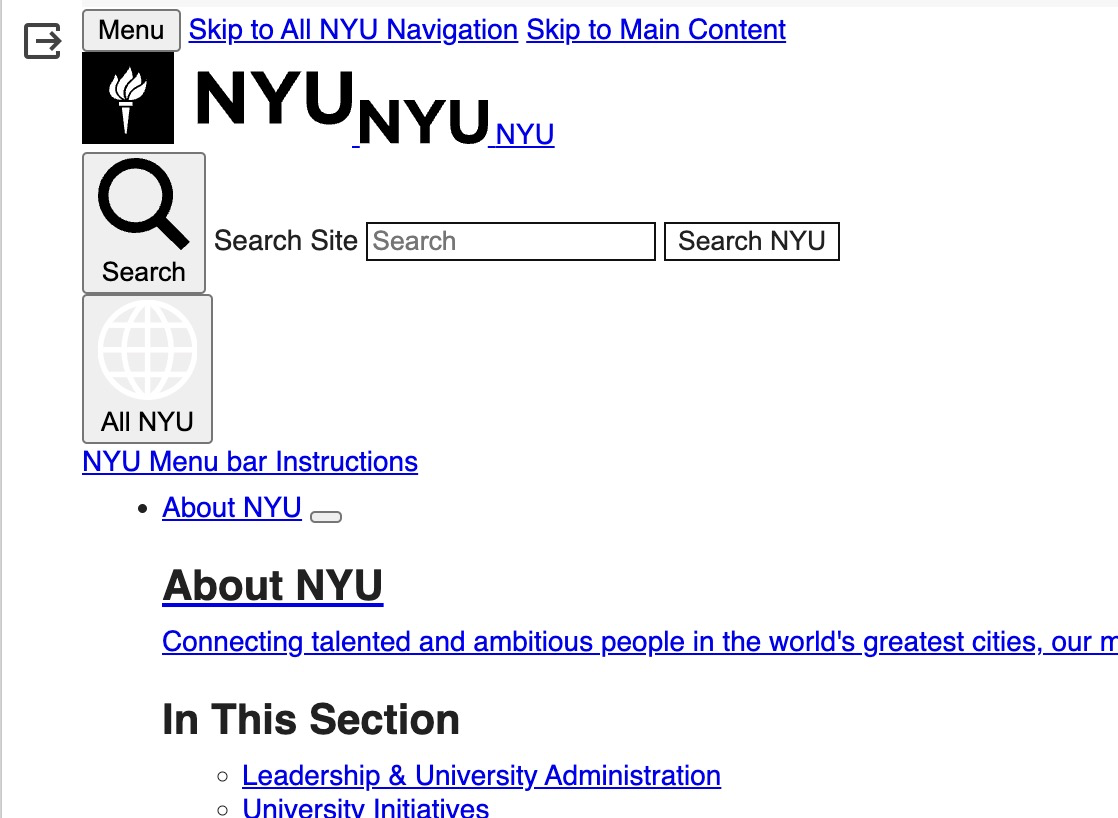
Let's scrape the stories from the front page of the New York University website. If we follow the same steps as above by typing in the data (in this case, only part of the data was needed) “NYU and IIT” we can see that one result pops up and it's HTML.
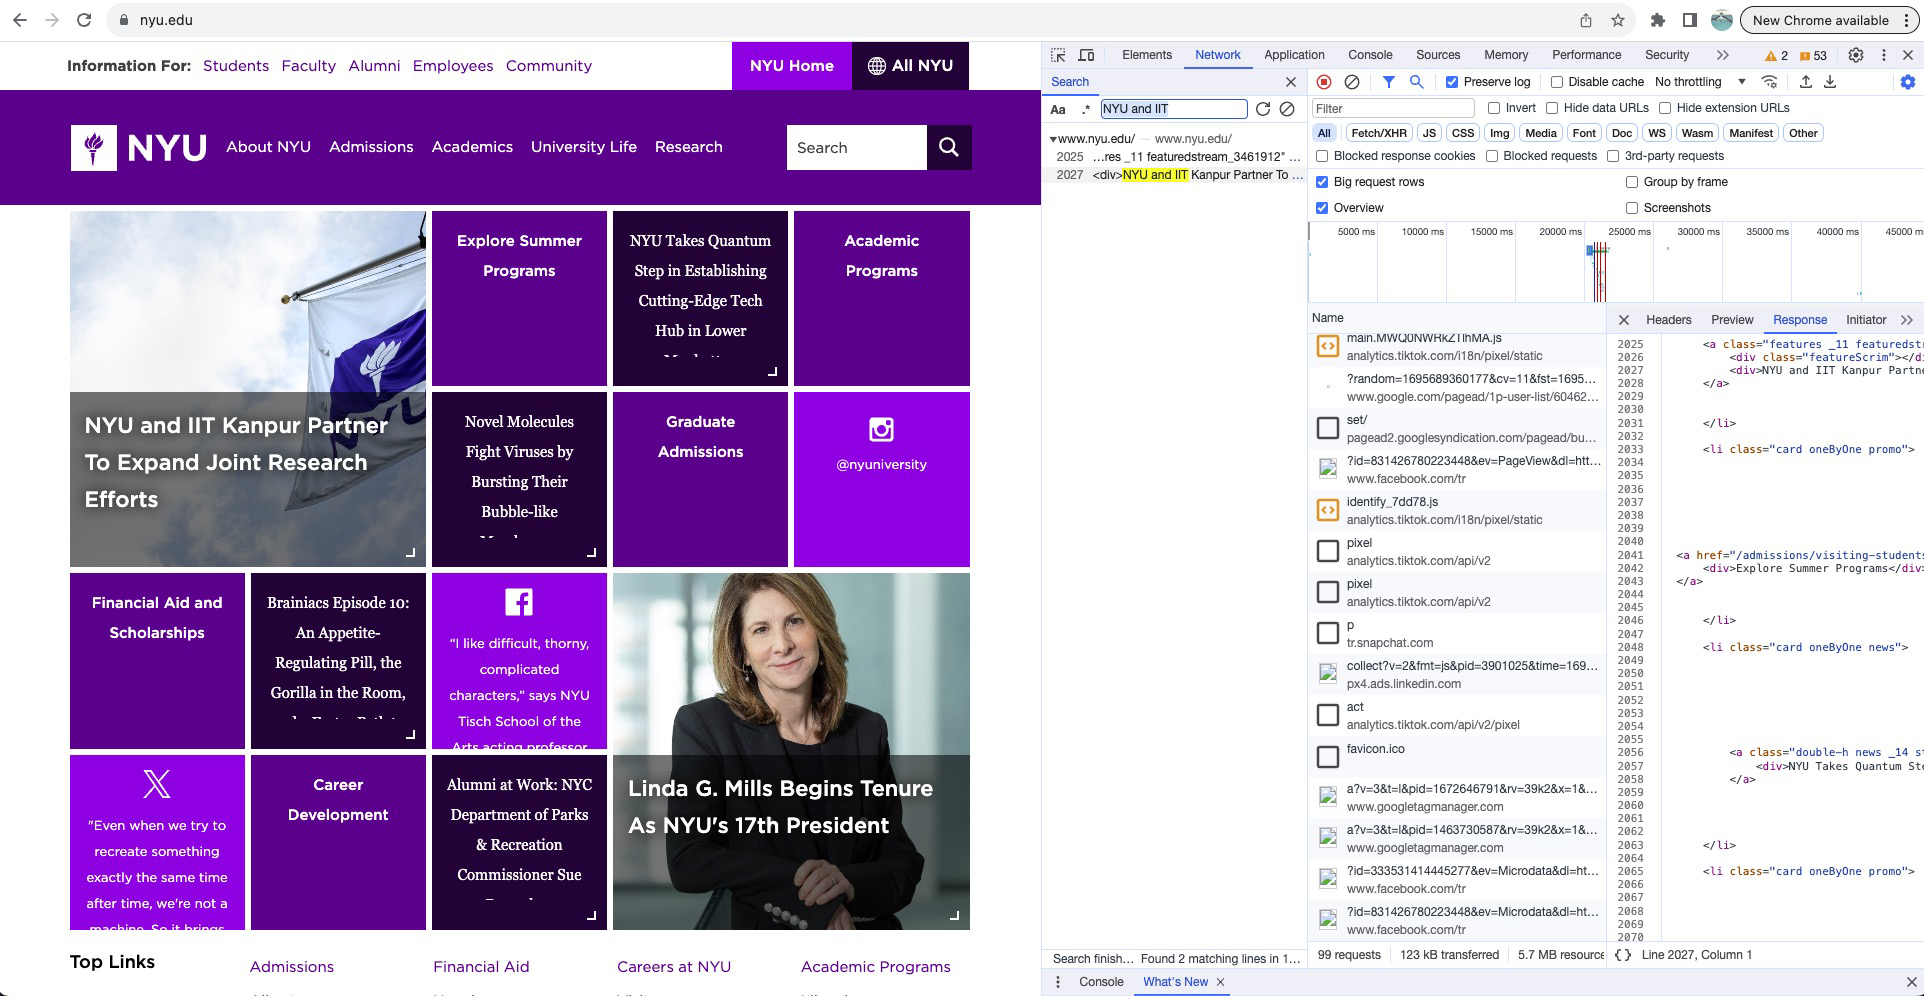
Looking at the request headers, we can see that the request URL is just the NYU website:
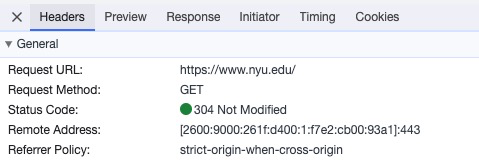
Because the data that we want is already embedded in HTML, we need to use an HTML parsing package such as BeautifulSoup or LXML to extract the data that we want.
Static Data Retrieval
Once you’ve identified where the data is, you can then go to the “headers” section of the request in the Inspect Elements tool to see the request URL, request method, and headers. When sending HTTP requests, it’s usually a good idea to include a few extra headers to make your request more realistic.
By default, the Python requests package only includes a few basic headers, such as Content-Length and Content-Type. The requests package also has a default User-Agent which is python-requests/[Python version]. This is a giant red flag for websites since this is not what a regular User-Agent header looks like. You can see what your User Agent is under the Inspect Elements header tab and use that one, or you can use the handy fake-useragent Python package to generate one for you.
After pip installing it:
$ pip install fake-useragentYou can generate random user-agent strings from the code below:
from fake_useragent import UserAgent

ua = UserAgent()
print(ua.random)
Output:
Mozilla/5.0 (Windows NT 6.1; Win64; x64; rv:109.0) Gecko/20100101 Firefox/115.0Generally, you can get by with just changing the User-Agent header, but if you want to be extra careful, it never hurts to copy and paste some of the other headers that you see under the Inspect Elements Headers section in the request that you’re trying to recreate.
Then to get the data you can just do the following:
import requests
from fake_useragent import UserAgent

ua = UserAgent()

headers = {'User-Agent': ua.random}
url = 'https://www.nyu.edu'

response = requests.get(url, headers=headers)
Making Sure You’re Scraping the Correct Data
Once we've sent the request, we want to ensure that the data we want is actually being returned. It's possible that the website's server is checking parts of the request that we didn't include and, thus, will respond with a page asking if we're a bot!
It can be tricky to make sure that the HTML is all there, but if you’re writing/prototyping the scraper in a Jupyter or Google Colab notebook (which I would recommend), you can use the following IPython Notebook feature, which renders HTML for you:
from IPython.display import HTML

HTML(response.text)
Rendered HTML Output:
We can see from the output that all of the HTML is there!
If the HTML you expect to receive is not being shown, the server likely doesn’t like something about your request. This could be a simple fix, such as adding other commonly checked headers, such as the Referer header, or it could be something more complicated, such as the quality of the IP address of your computer.
Basics of XPath
To parse HTML, you can use BeautifulSoup, which you can learn more about here, or the LXML package, which is based more on XPath expressions. I like using XPath because it often leads to, in my opinion, cleaner code, is faster, and can do more.
Here is a basic rundown of how XPath expressions work:
/ - Selects nodes one level down from the current node. Example: /a finds all a tags one level below the current node.
// - Selects nodes at any level below the current node. Example: //a finds all a tags anywhere below the current node.
<tag>[] - Square brackets denote a predicate. Predicates filter the selected nodes based on certain conditions. Example: //a[@class=‘my_class’] finds all a tags with the class exactly equal to “my_class”.
@<attribute> - Selects an attribute of an element. Example: //a/@href selects the href attribute of all a tags.
text() - Selects the text content of a node. Example: //p/text() selects the text content of all p tags.
To learn more about XPath, see this cheat sheet.
Test Your XPath Inside of Your Browser
When writing XPath expressions, it's important to test each part as you write it to ensure each piece works.
To write an XPath expression that gets all of the li tags for the NYU example, we can go to the console page of Inspect Elements and use the following syntax, which will let us select elements on the page with an XPath expression: $x(‘/XPath/here’). As we write the expression, the elements get selected in real time! If you want to learn more about this feature check out my article on hidden gems in Chrome DevTools.
First we will select the all of the ul tags on the page, of which there are 47:

The ul element that we want has a handy class named “stream” which we will use to make sure we are selecting the right one:

Then we want to get the text inside of the li elements but we also want to make sure that the parent element of the li tag is a div. We can achieve this by using an XPath “axis”:

Parsing HTML With Python’s LXML Package
Now let’s combine everything together! Python’s LXML package allows us to parse HTML via XPath expressions. I won’t go too deep into their package in this article, but if you want to learn more, you can read their documentation here.
Combing the code together, we get the following, which scrapes all of the news stories on the homepage of the NYU website:
import requests
from fake_useragent import UserAgent
from lxml import html

ua = UserAgent()

headers = {'User-Agent': ua.random}
url = 'https://www.nyu.edu'

response = requests.get(url, headers=headers)

tree = html.fromstring(response.text)
xpath_exp = '//ul[@class="stream"]/li//text()/parent::div'

for article in tree.xpath(xpath_exp):
    print(article.text_content())
Output:

Dynamic Data Retrieval
Time to get into the interesting stuff! Let’s go back to the Whole Foods example where we were trying to scrape the prices of their food.
Using a Private API
When the Javascript sends the request to the Whole Foods API, we can see that the price of the item is nicely placed in the JSON response:
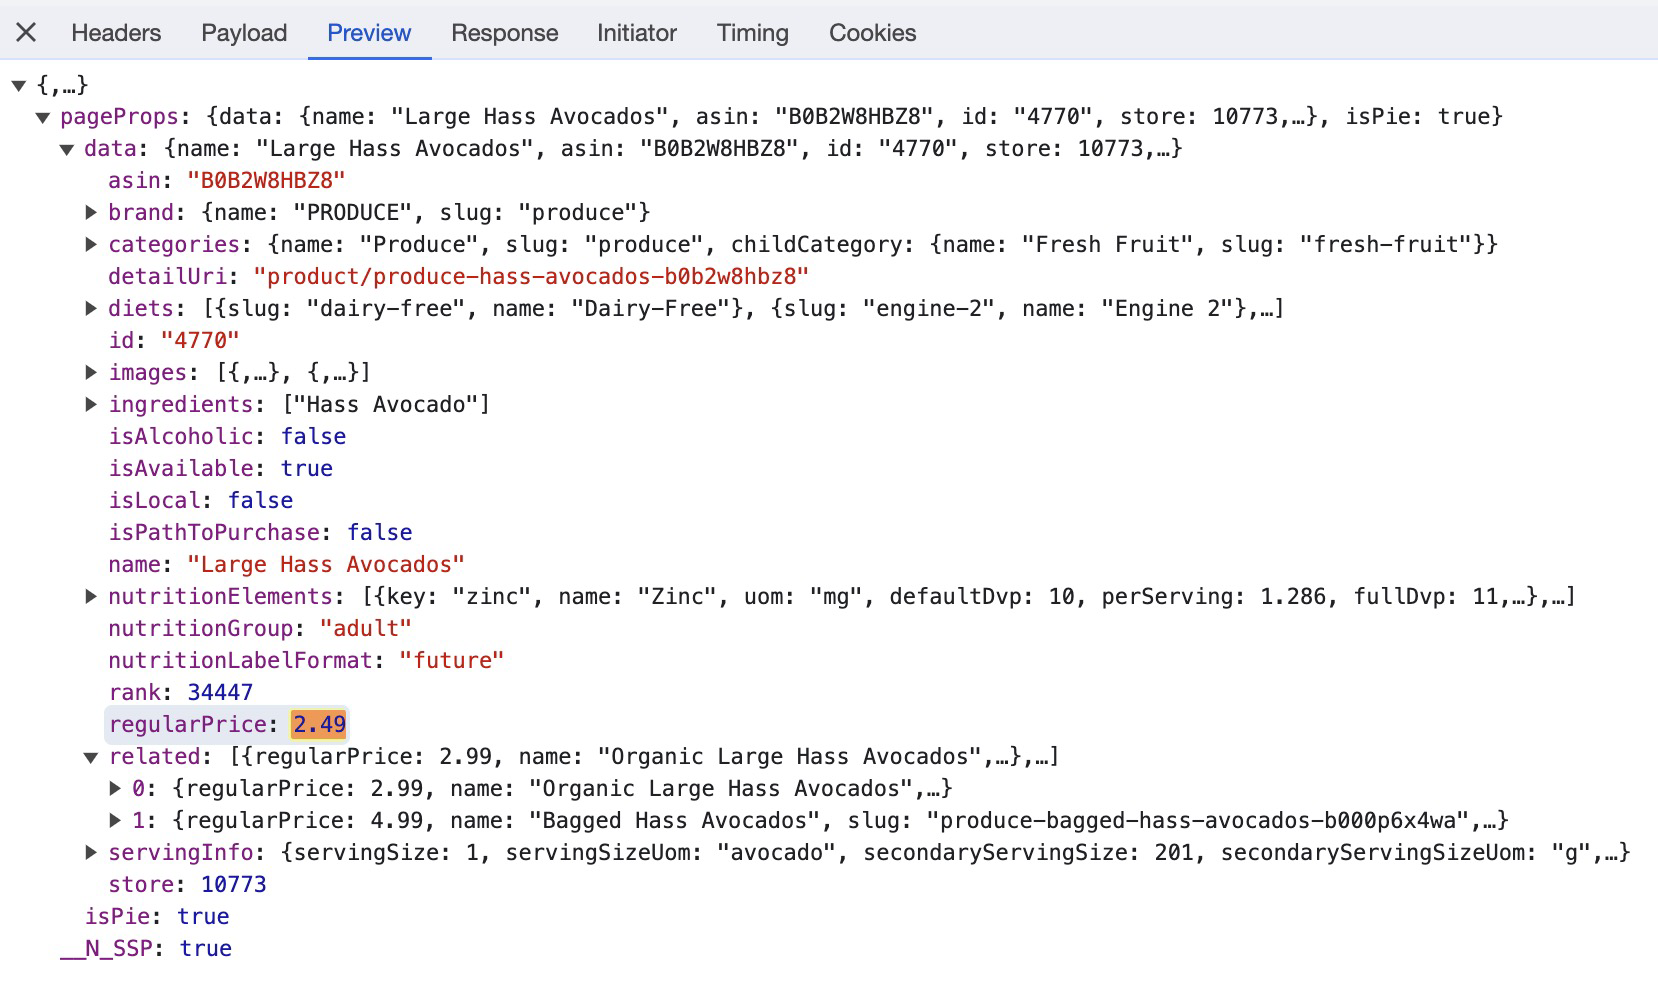
By analyzing the request in the Inspect Elements tool, we can see two query string parameters that we need to send in our request - storeId, and product-detail.
In the below code, I have separated the URL from the query string parameters as well as included more headers to make the request more similar to what was actually sent:
import json
import requests

from fake_useragent import UserAgent

ua = UserAgent()

headers = {
    "Accept": "*/*",
    "Accept-Encoding": "gzip, deflate, br",
    "Accept-Language": "en-US,en;q=0.9",
    "Connection": "keep-alive",
    "Host": "www.wholefoodsmarket.com",
    "Sec-Fetch-Dest": "empty",
    "Sec-Fetch-Mode": "cors",
    "Sec-Fetch-Site": "same-origin",
    "User-Agent": ua.random,
    "sec-ch-ua": '"Google Chrome";v="117", "Not;A=Brand";v="8", "Chromium";v="117"',
    "sec-ch-ua-mobile": "?0",
    "sec-ch-ua-platform": "macOS"
}

api_url = 'https://www.wholefoodsmarket.com/_next/data/cIPmXap6kWkre23RzNwD-/product/produce-large-hass-avocados-b0b2w8hbz8.json'

query_string = {
    'store': 10773,
    'product-detail': 'produce-large-hass-avocados-b0b2w8hbz8'
}

response = requests.get(api_url, params=query_string, headers=headers)

print(json.dumps(response.json(), indent=4))
This code returns a nicely formatted JSON response that is very easy for us to parse! Here is part of the output from the code:

Closing Remarks
While the Whole Foods API was easy to reverse engineer, some APIs are not, which is when using another tool such as Selenium can be helpful. Even though Selenium can make scraping easy, it is generally best to avoid as the overhead for running an entire browser is very high and often more than is necessary.
However, a scenario when it can be extremely useful is when private APIs have unique header/cookie tokens that are hard to recreate. This is when you would want to use Selenium - but only to retrieve the hard to get tokens, after which you can take them from Selenium and put them into a request Session object.
I hope you learned something new about web scraping using Python! This is meant to be a general guide that will apply to most data that people want to scrape. For most web scraping on the internet, this is the general framework that I walk through each time.